
可能由于你之前是使用calico插件的,在卸载calico后并没有删除calico的配置文件,导致k8s默认加载calico从而导致出错。
解决办法是删除掉 /etc/cni/net.d/ 目录下的 calico 配置文件即可。
(注意:要删除所有节点的calico配置文件)

可能由于你之前是使用calico插件的,在卸载calico后并没有删除calico的配置文件,导致k8s默认加载calico从而导致出错。
解决办法是删除掉 /etc/cni/net.d/ 目录下的 calico 配置文件即可。
(注意:要删除所有节点的calico配置文件)
Posted in 未分类
使用yaml配置文件进行创建:
kubectl apply -f xxx.yaml
使用yaml配置文件进行删除:
kubectl delete -f xxx.yaml
普通删除指定pod:
kubectl delete pod [pod名称] -n [namespace名称]
如果一直处于Terminating的状态且删除卡死,可增加参数 –force –grace-period=0 强制删除:
kubectl delete pod [pod名称] -n [namespace名称] --force --grace-period=0
Posted in 未分类
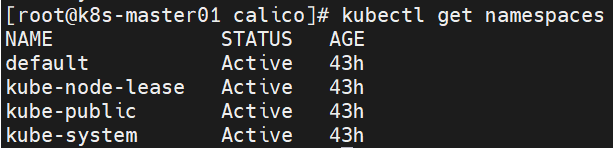
1. 查看所有namespace
kubectl get namespaces
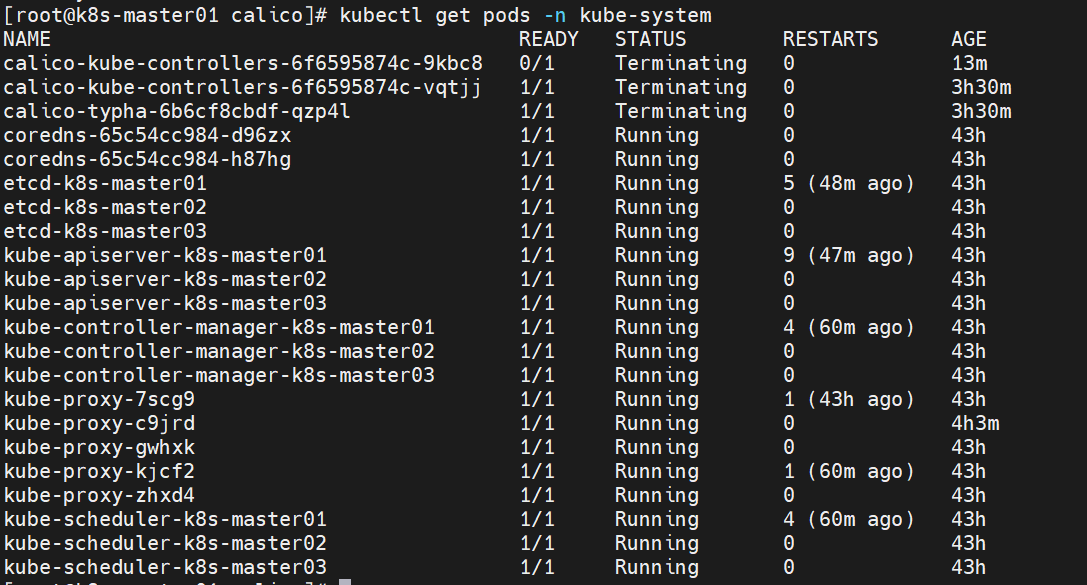
2. 查看指定namespace下的所有pods
# 获取 kube-system命名空间下所有pods信息
kubectl get pods -n kube-system
Posted in 未分类
使用 systemctl status keepalived 名称查看运行情况:
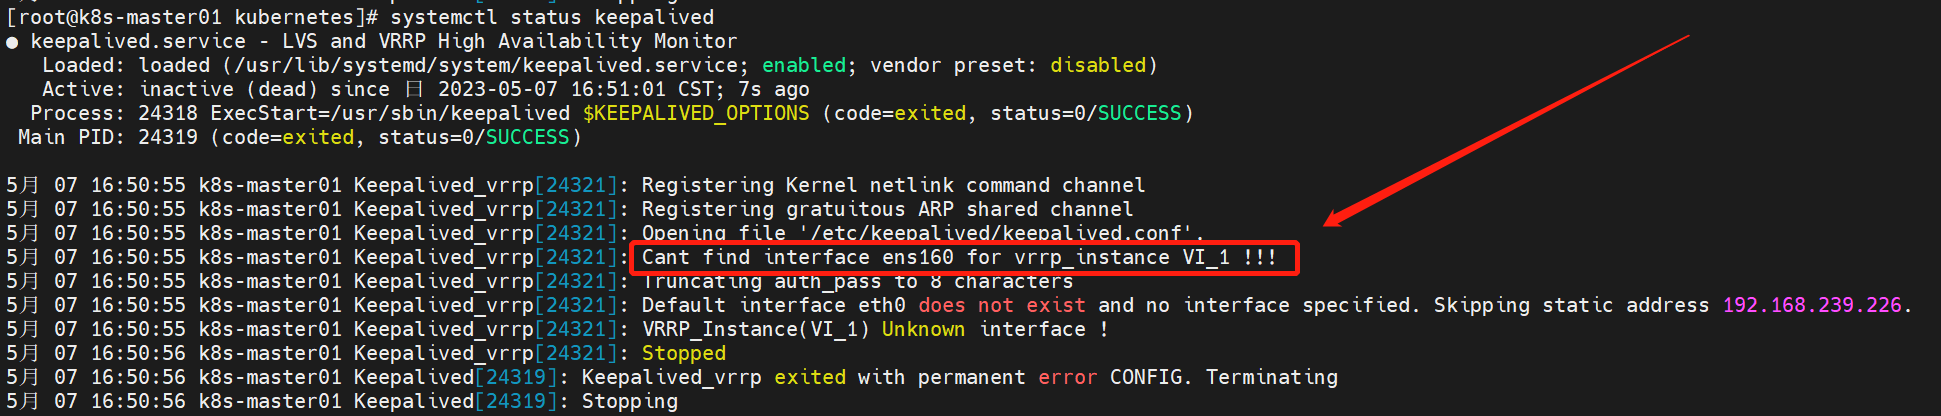
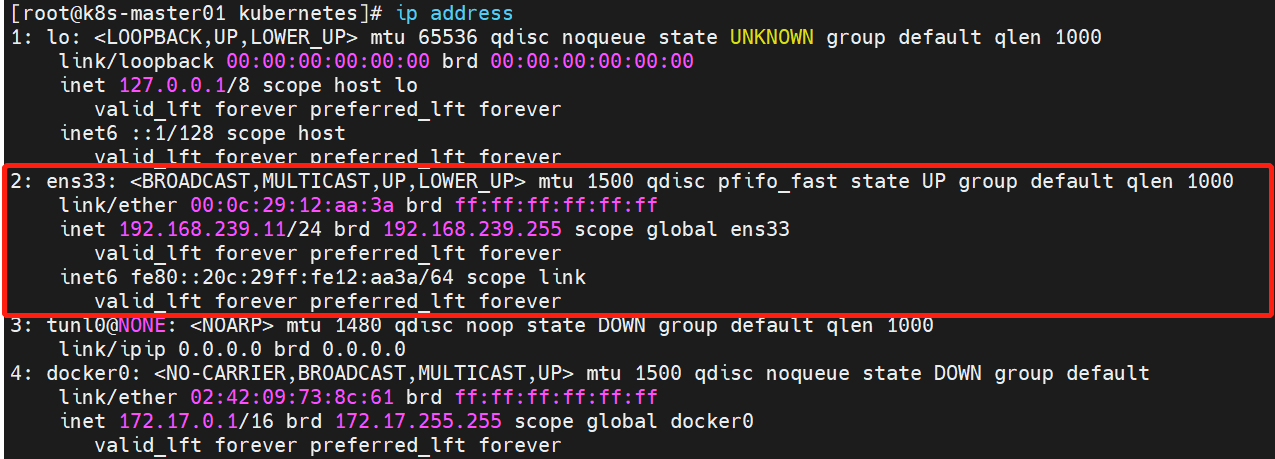
这种情况一般时keepalived配置中所指定的网卡不存在引起的。大家使用网上教程的时候要注意记得更改网卡名称,根据实际的网卡名称来进行配置。不指导网卡名称时什么的,可以使用“ip address”命令进行查看:
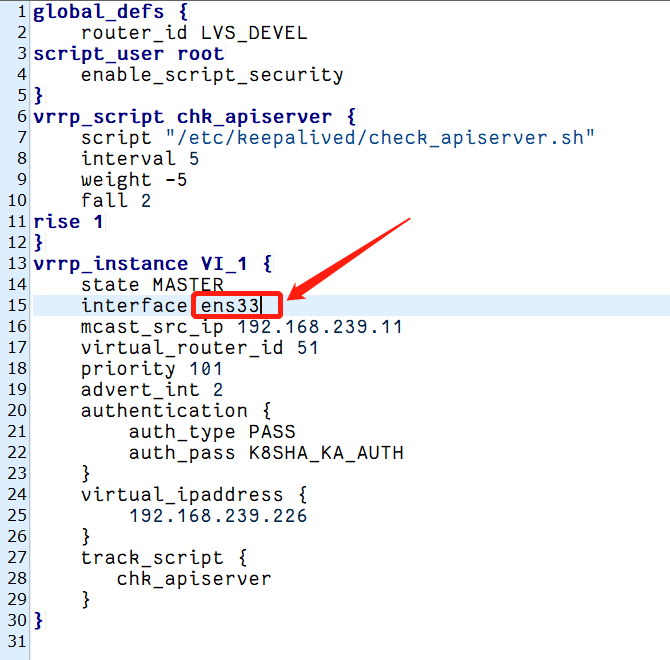
systemctl restart keepalived
Posted in 未分类
可以先使用以下命令查看k8s的启动日志:
systemctl status kubelet
或使用以下命令查看最近的k8s日志:
journalctl -xeu kubelet

所以在初始化前修改/etc/containerd/config.toml的镜像地址参数:
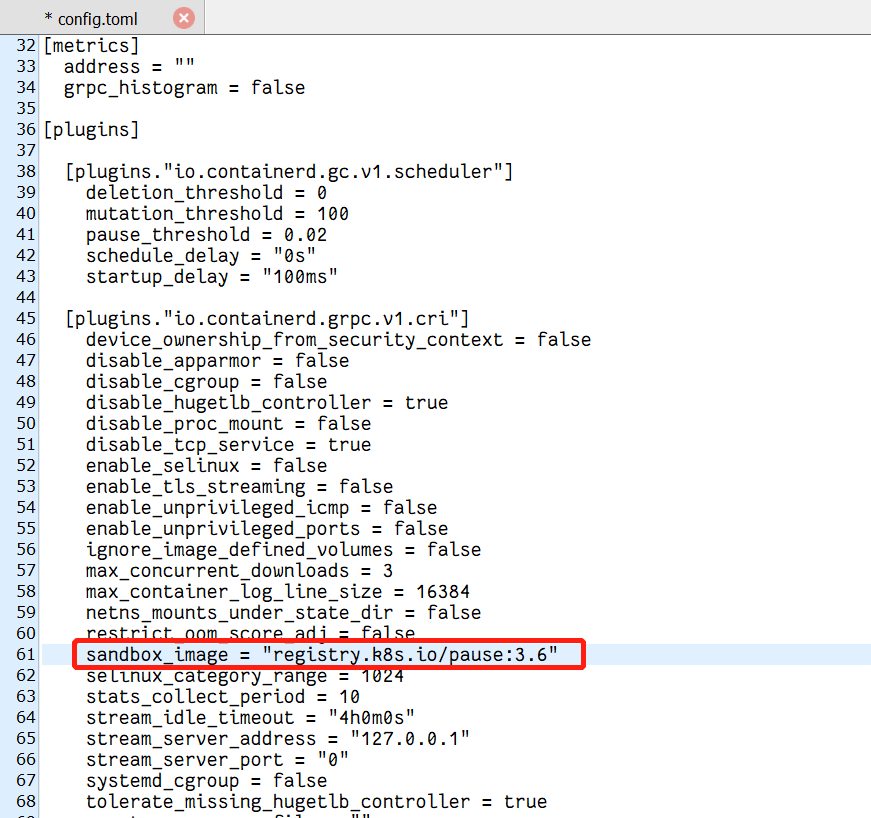
[plugins."io.containerd.grpc.v1.cri"]
  sandbox_image = "registry.aliyuncs.com/k8sxio/pause:3.6"
然后重启containerd:
systemctl restart containerd
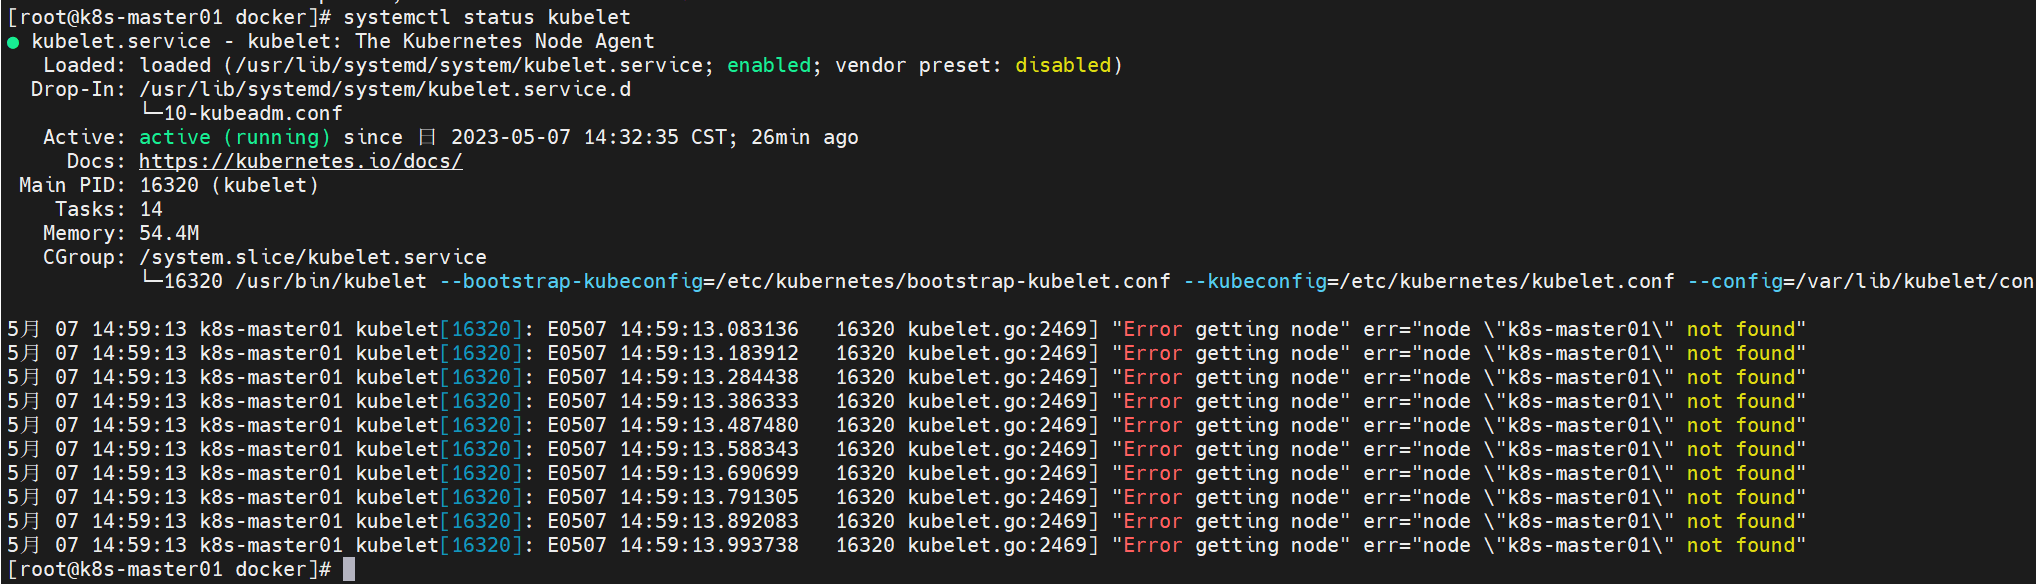
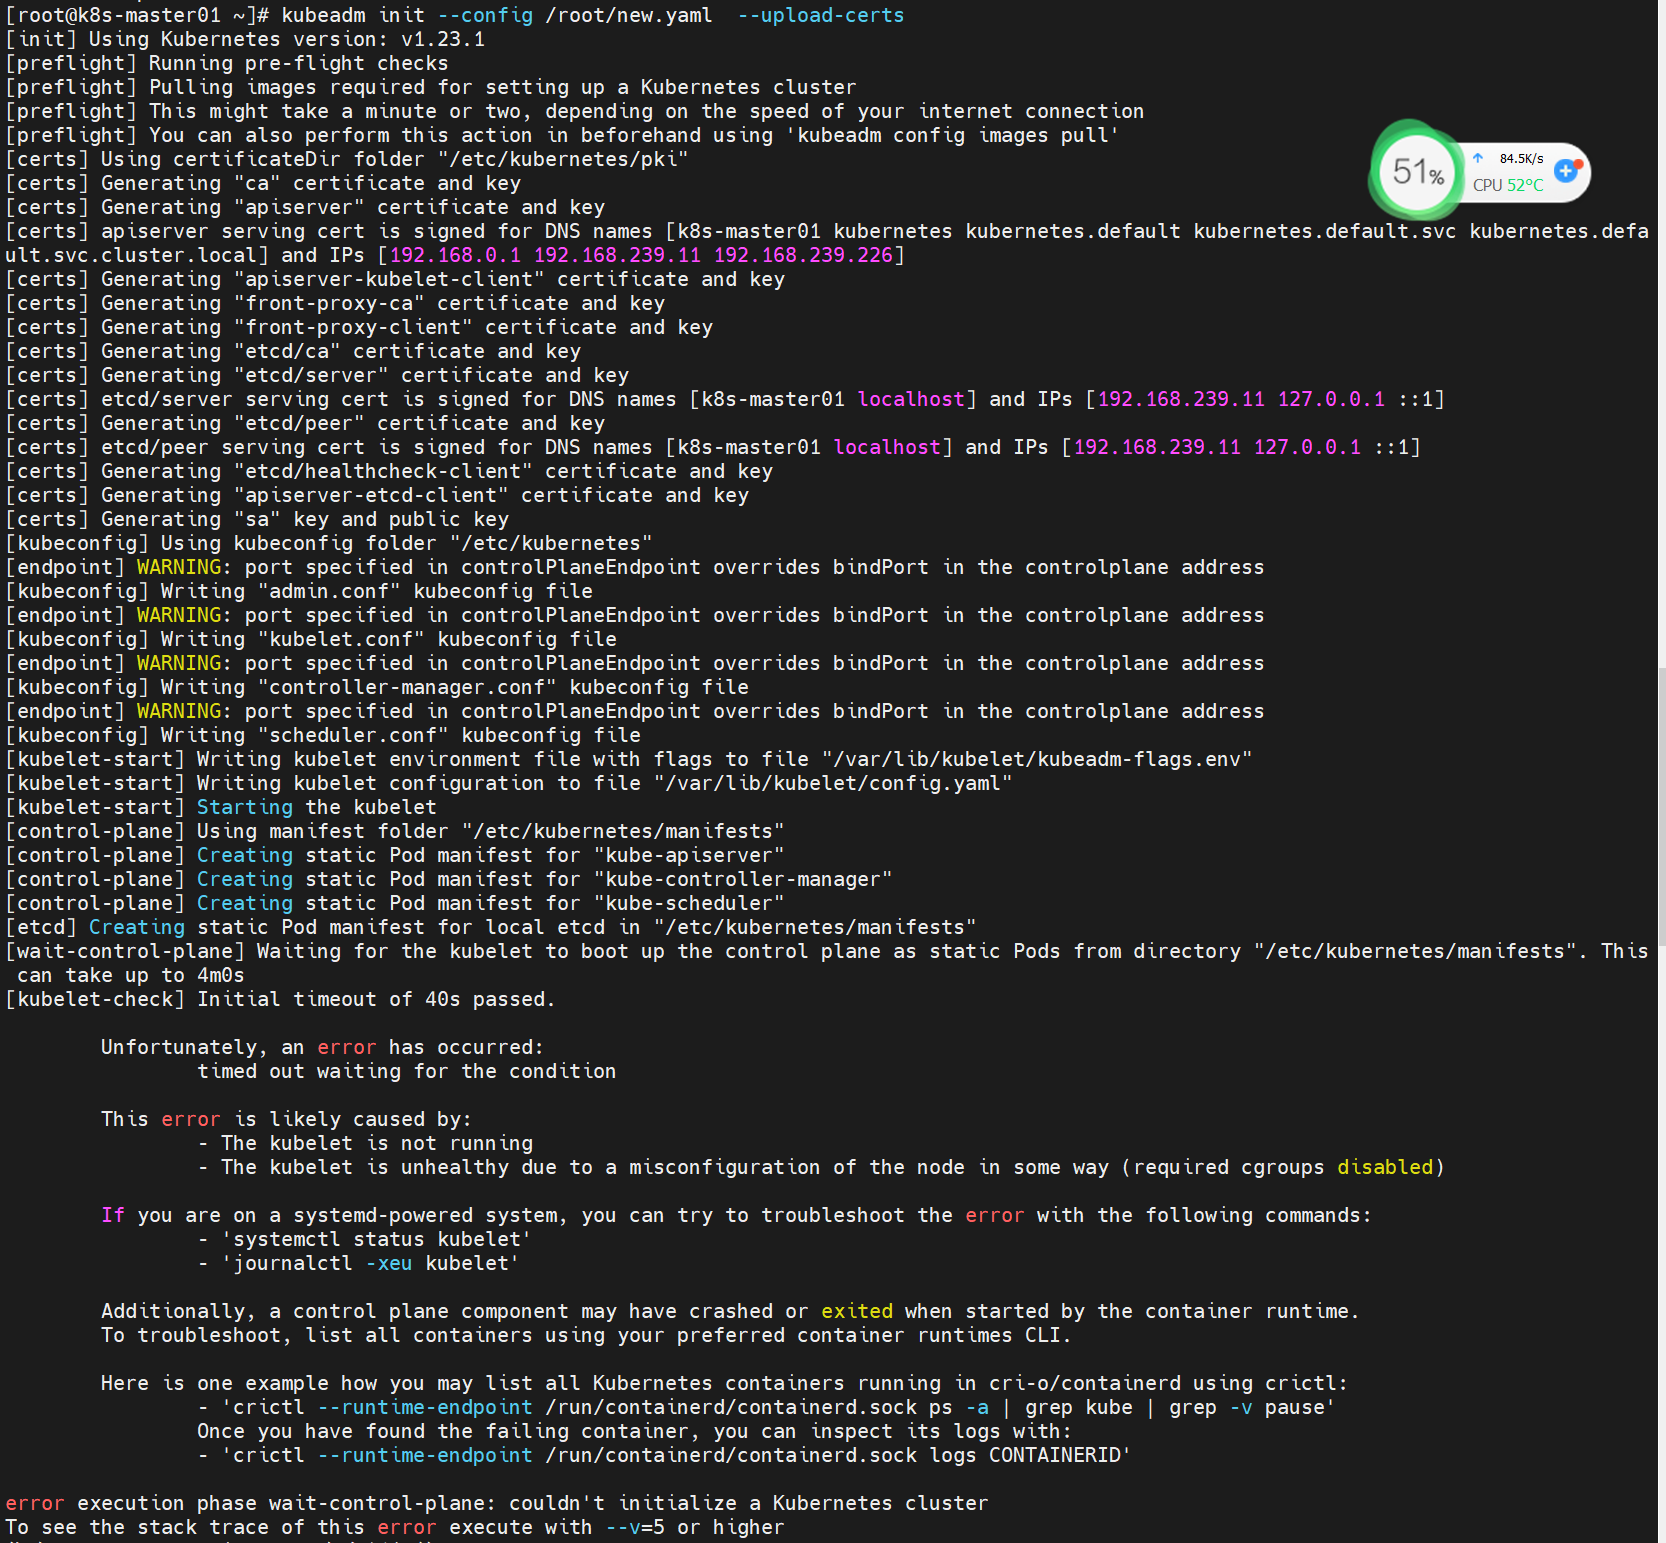
查看/var/log/messages的最后日志:
May  7 14:34:26 k8s-master01 kubelet: E0507 14:34:26.071077   16320 eviction_manager.go:254] "Eviction manager: failed to get summary stats" err="failed to get node info: node \"k8s-master01\" not found"
May  7 14:34:26 k8s-master01 kubelet: E0507 14:34:26.096124   16320 kubelet.go:2394] "Container runtime network not ready" networkReady="NetworkReady=false reason:NetworkPluginNotReady message:Network plugin returns error: cni plugin not initialized"
May  7 14:34:26 k8s-master01 kubelet: E0507 14:34:26.160241   16320 kubelet.go:2469] "Error getting node" err="node \"k8s-master01\" not found"
May  7 14:34:26 k8s-master01 kubelet: E0507 14:34:26.262056   16320 kubelet.go:2469] "Error getting node" err="node \"k8s-master01\" not found"
May  7 14:34:26 k8s-master01 kubelet: E0507 14:34:26.362486   16320 kubelet.go:2469] "Error getting node" err="node \"k8s-master01\" not found"
May  7 14:34:26 k8s-master01 kubelet: E0507 14:34:26.463165   16320 kubelet.go:2469] "Error getting node" err="node \"k8s-master01\" not found"
这是由于还没有安装网络插件flannel引起的。
查看/var/log/messages的最后日志:
Aug 23 18:17:21 localhost kubelet: E0823 18:17:21.059626    9490 server.go:294] "Failed to run kubelet" err="failed to run Kubelet: misconfiguration: kubelet cgroup driver: \"systemd\" is different from docker cgroup driver: \"cgroupfs\""
Aug 23 18:17:21 localhost systemd: kubelet.service: main process exited, code=exited, status=1/FAILURE
Aug 23 18:17:21 localhost systemd: Unit kubelet.service entered failed state.
Aug 23 18:17:21 localhost systemd: kubelet.service failed.
从日志看出来,是因为hubernates与docker的cgroup驱动不一致引起的,那么我们只需要将两者的cgroup驱动设置为一直即可。(官方推荐systemd)
我们可以用以下指令确认一下docker的启动方式:
docker system info|grep -i driver

一、找到docker的配置文件/etc/docker/daemon.json并修改添加如下参数(没有找到则新建一个):
"exec-opts": ["native.cgroupdriver=systemd"]
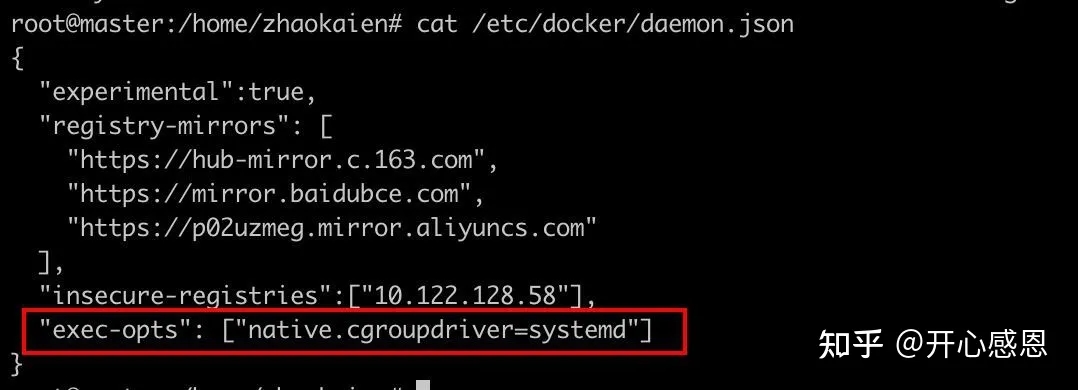
二、重启docker,并再次检查docker的驱动是否已经变更:
systemctl restart docker
docker system info|grep -i driver

有两个文件:
一、/etc/sysconfig/kubelet
增加参数–cgroup-driver=systemd:

二、修改10-kubeadm.conf文件(使用该指令查找:find / -name ’10-kubeadm.conf’)
增加参数–cgroup-driver=systemd:
然后重启kubernates服务即可:
systemctl restart kubelet
最后,重置kubeamdm并再次执行k8s初始化指令即可:
kubeadm reset
Posted in 未分类
准备工作:
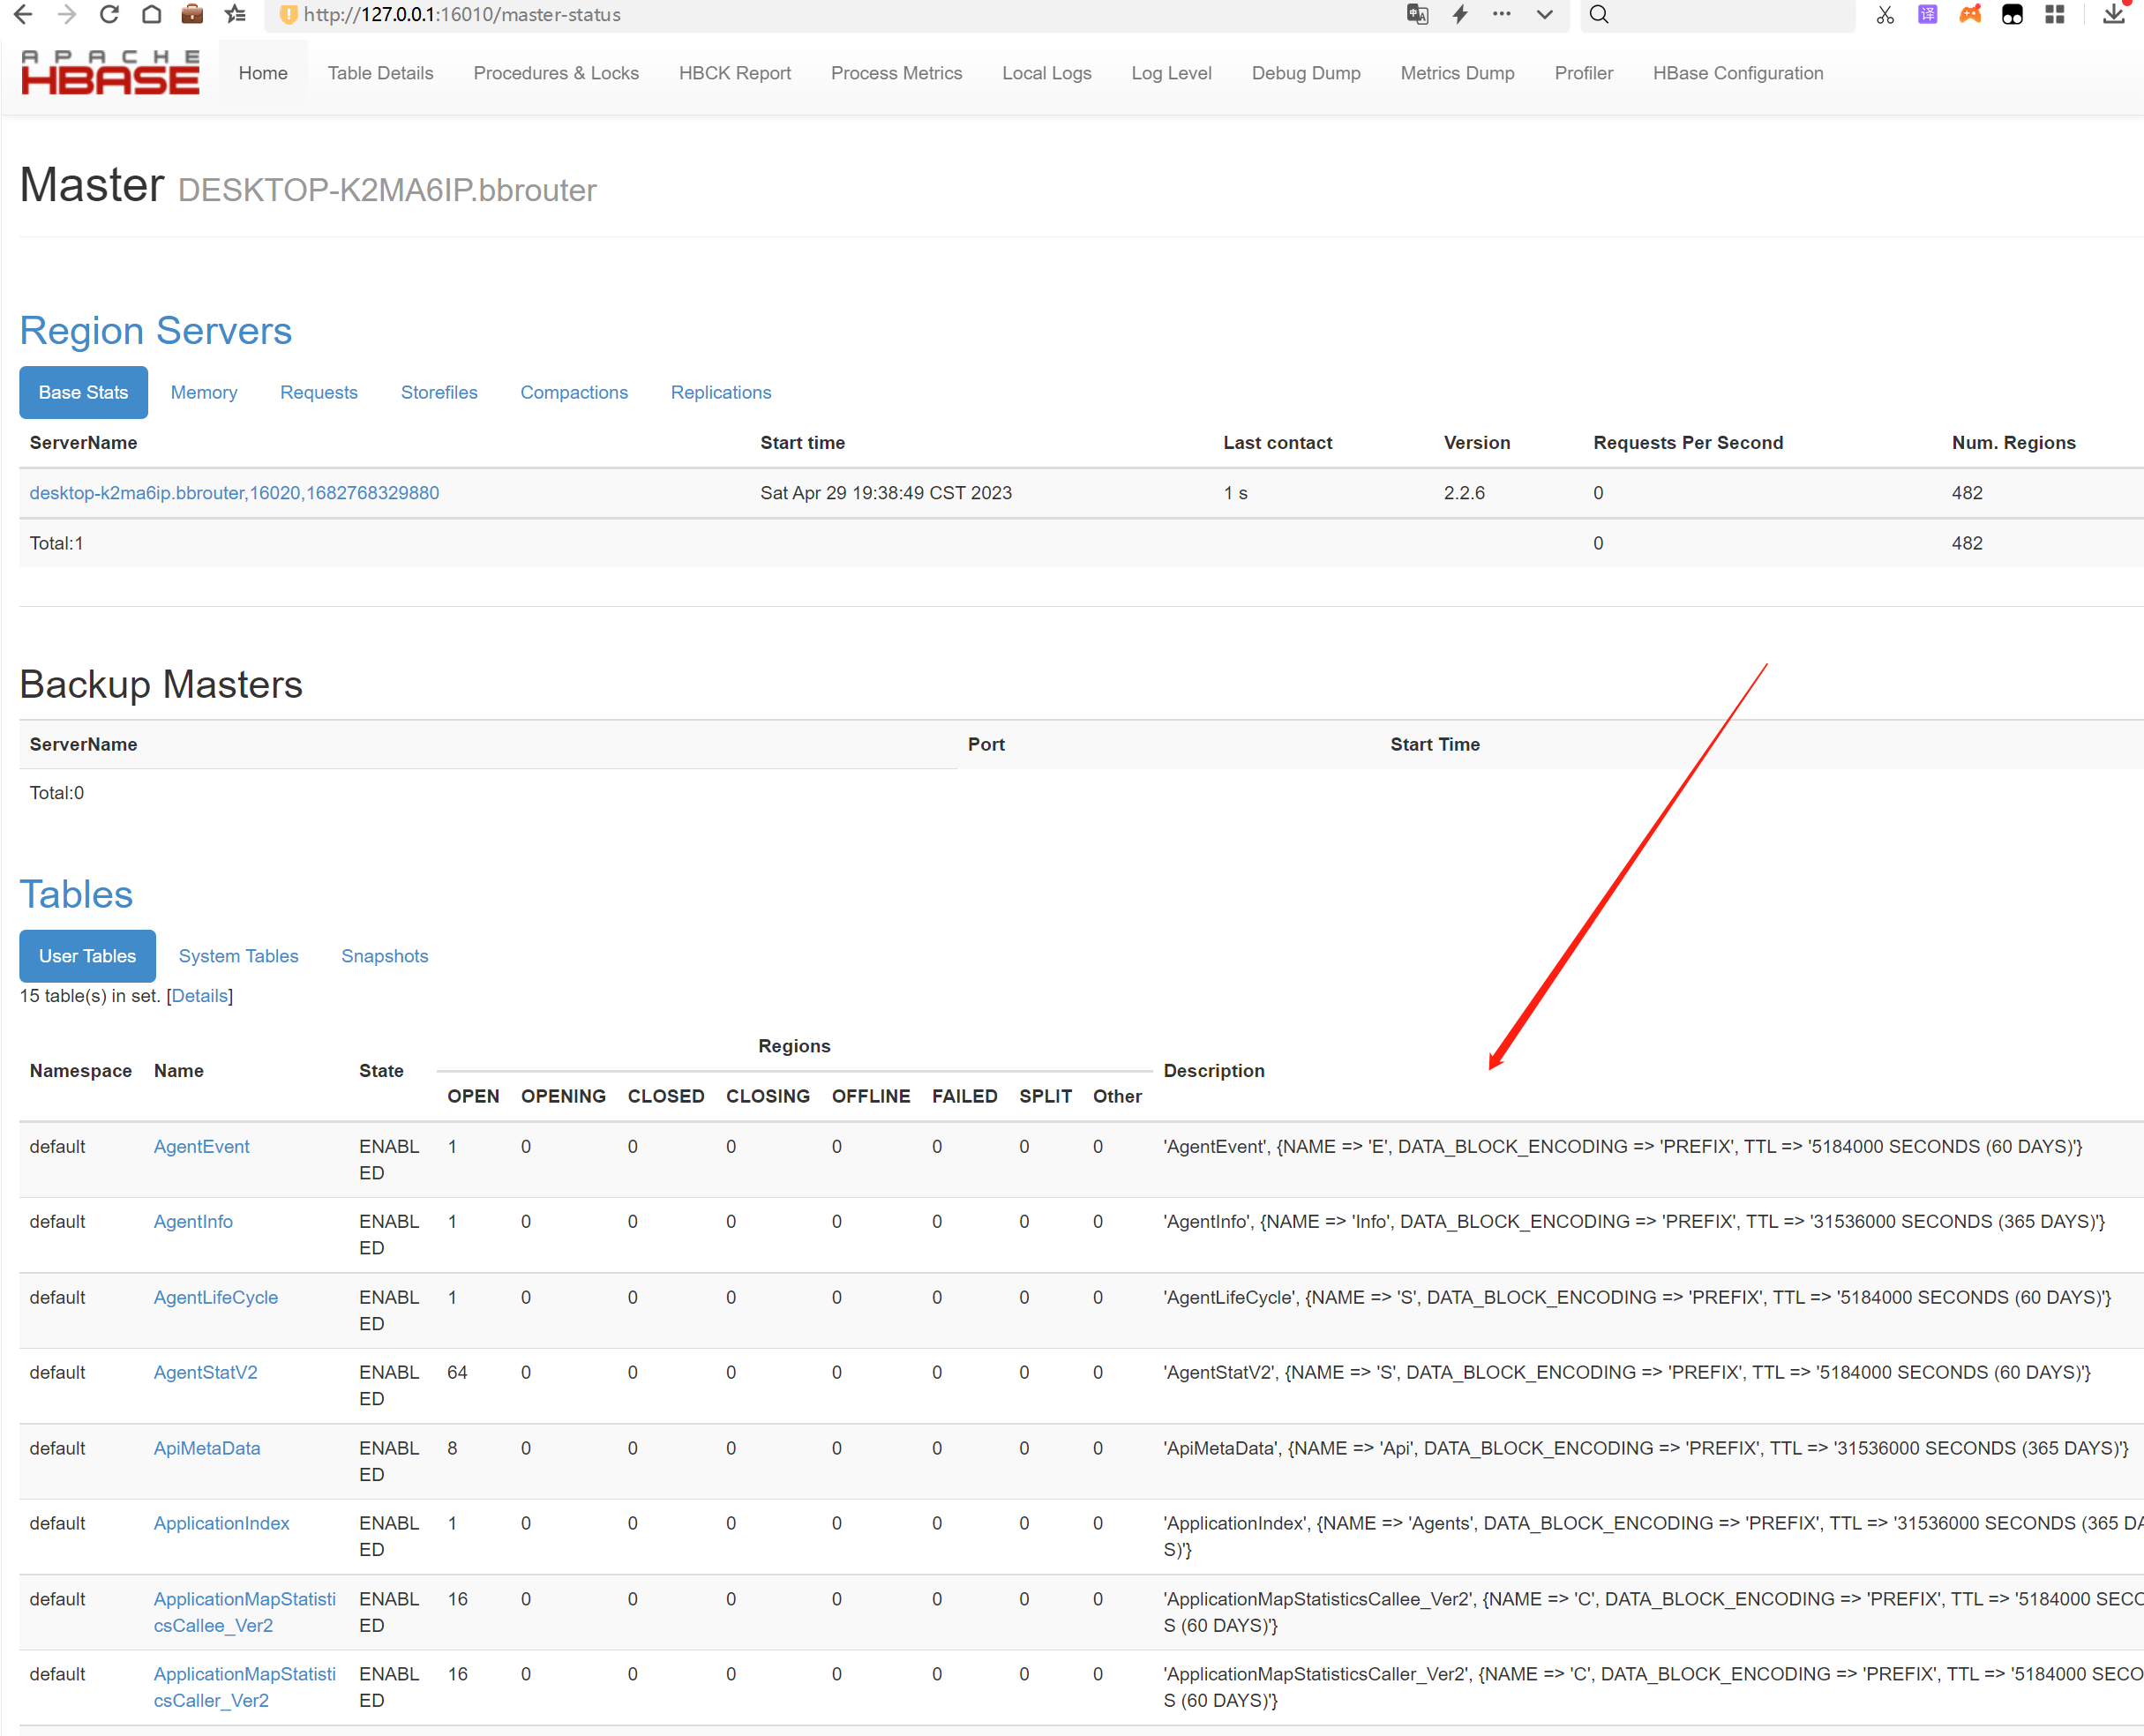
预先安装好Hbase(pinpoint最高支持1.x,不支持2.x,而1.x又不支持127.0.0.1:16010的web管理界面,脑壳疼)
注意准备jdk11(主服务需要jdk11,但是agent经过测试在jdk8下也能够正常运行)
下载pinpoint的habse数据库初始化脚本
https://github.com/pinpoint-apm/pinpoint/blob/master/hbase/scripts/hbase-create.hbase
然后使用命令 hbase shell hbase-create.hbase 进行导入:

https://github.com/pinpoint-apm/pinpoint/releases/tag/v2.5.1
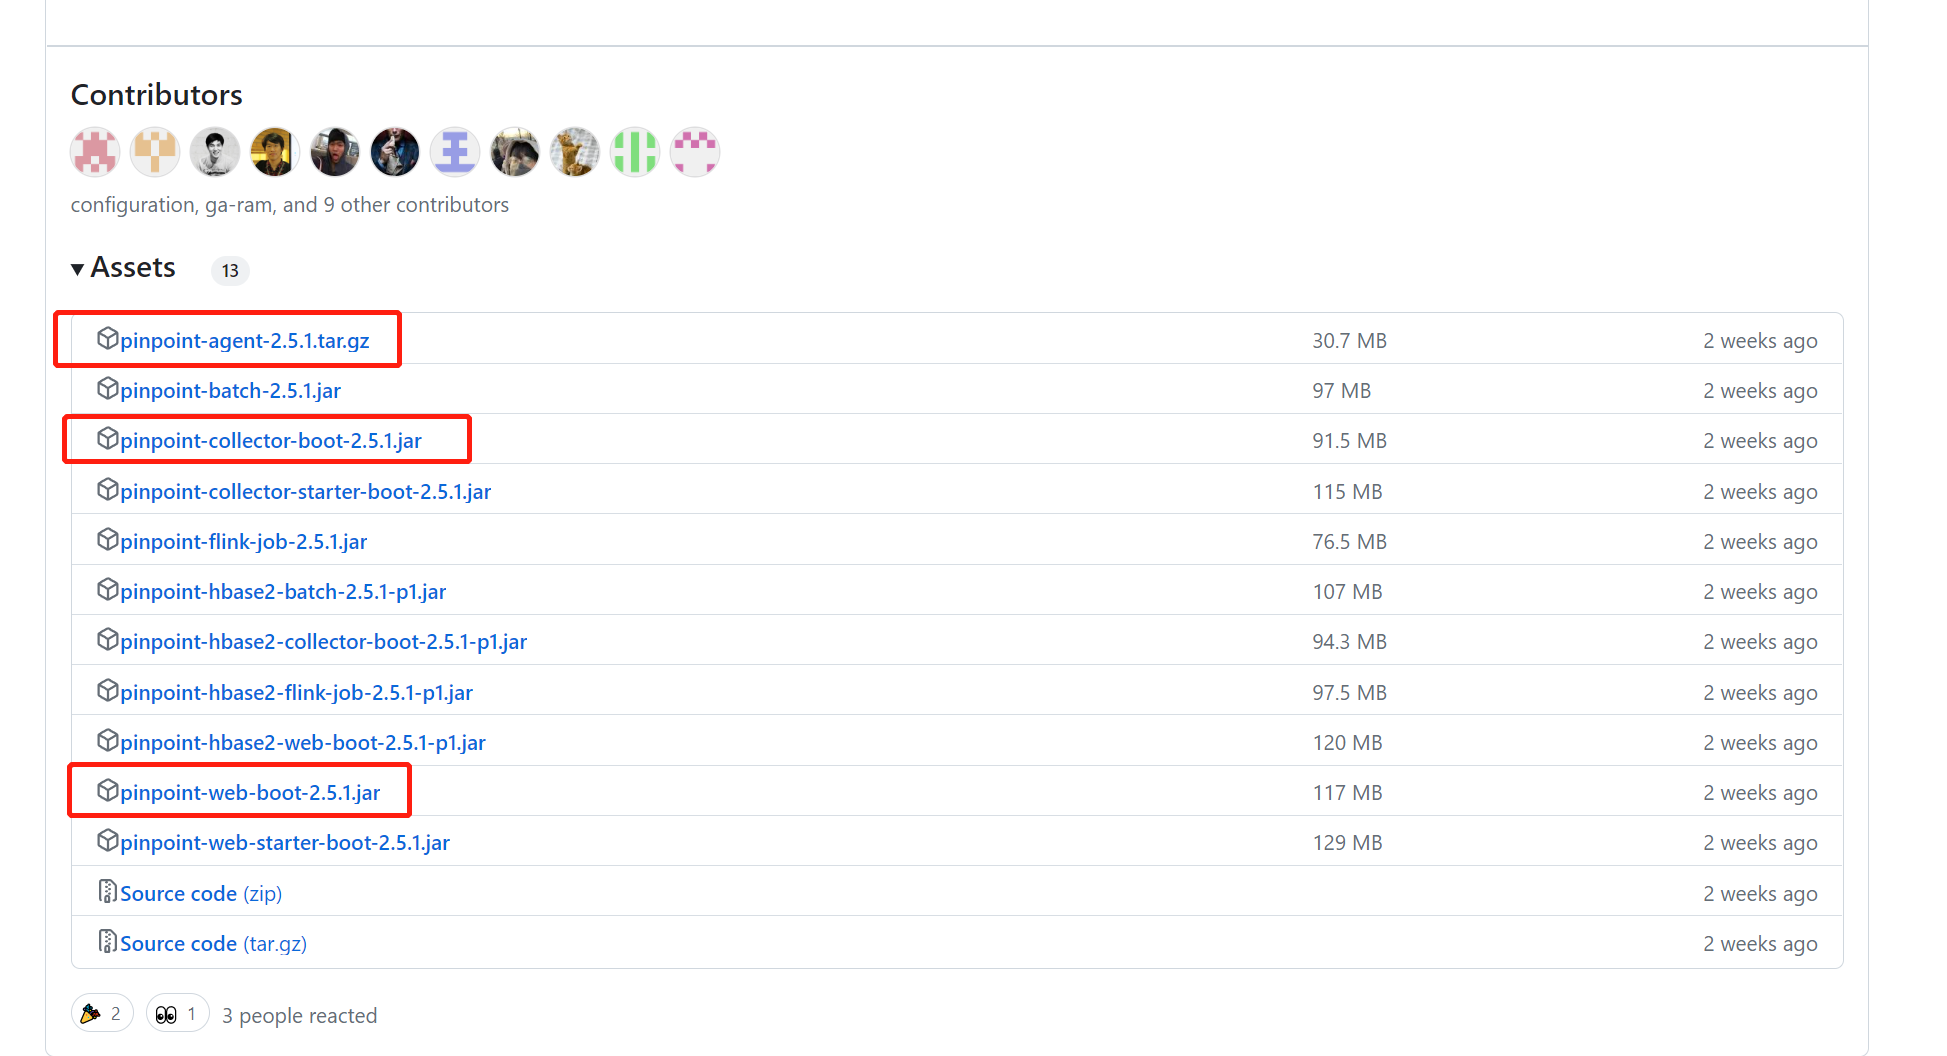
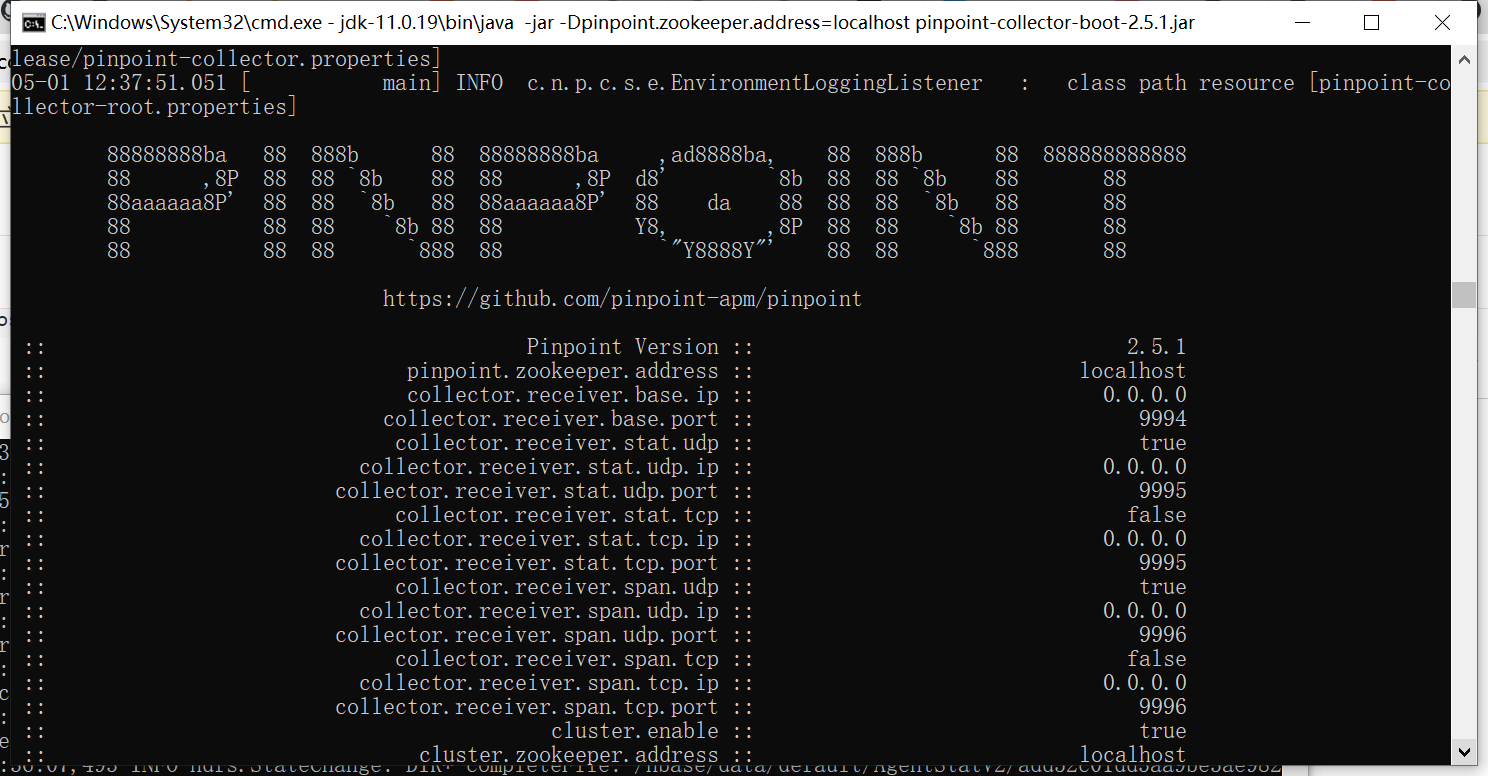
1、运行数据收集器(默认占用端口8081)
java -jar -Dpinpoint.zookeeper.address=localhost pinpoint-collector-boot-2.5.1.jar
2、运行web管理界面(默认占用端口8080)
java -jar -Dpinpoint.zookeeper.address=localhost pinpoint-web-boot-2.5.1.jar
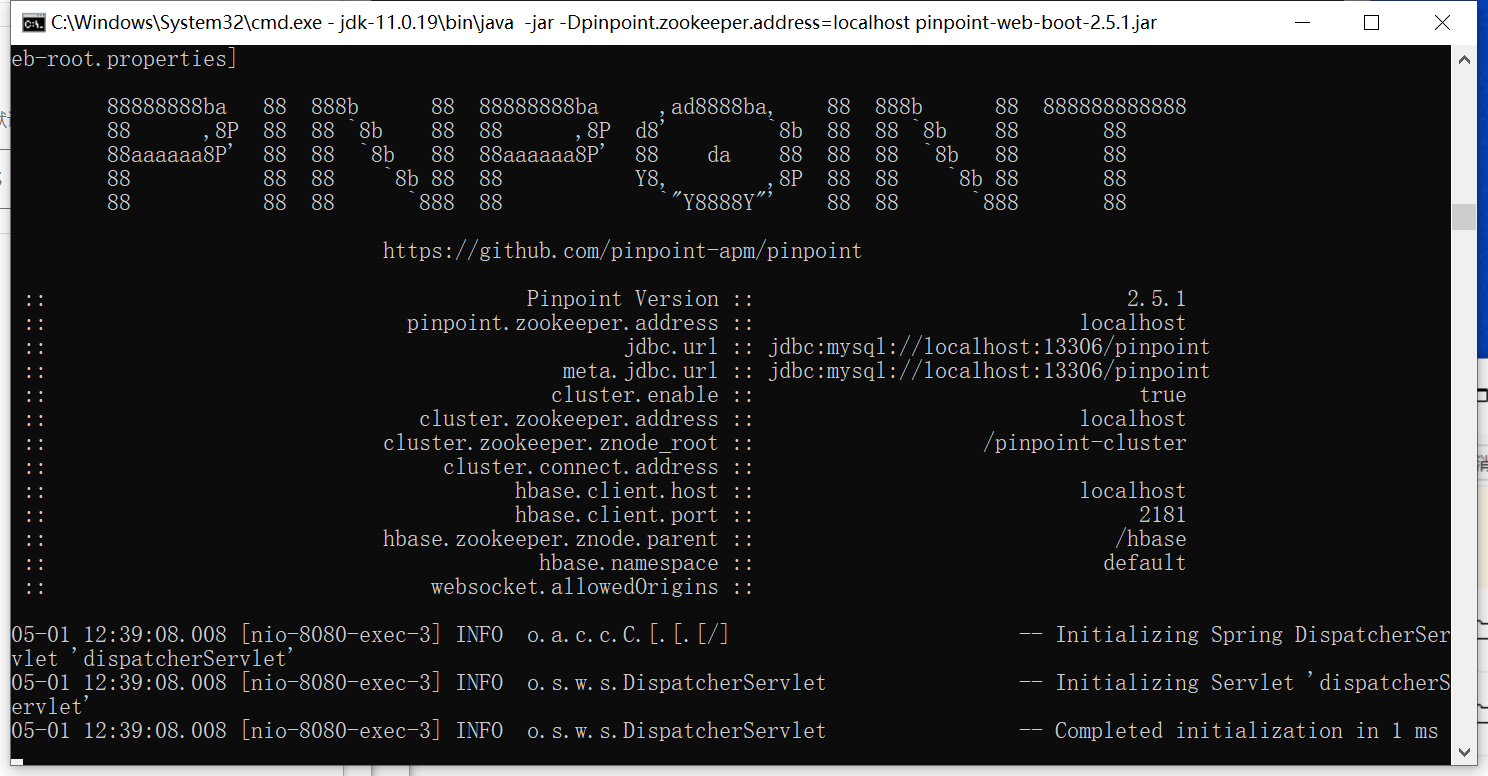
注意:运行需要jdk11+
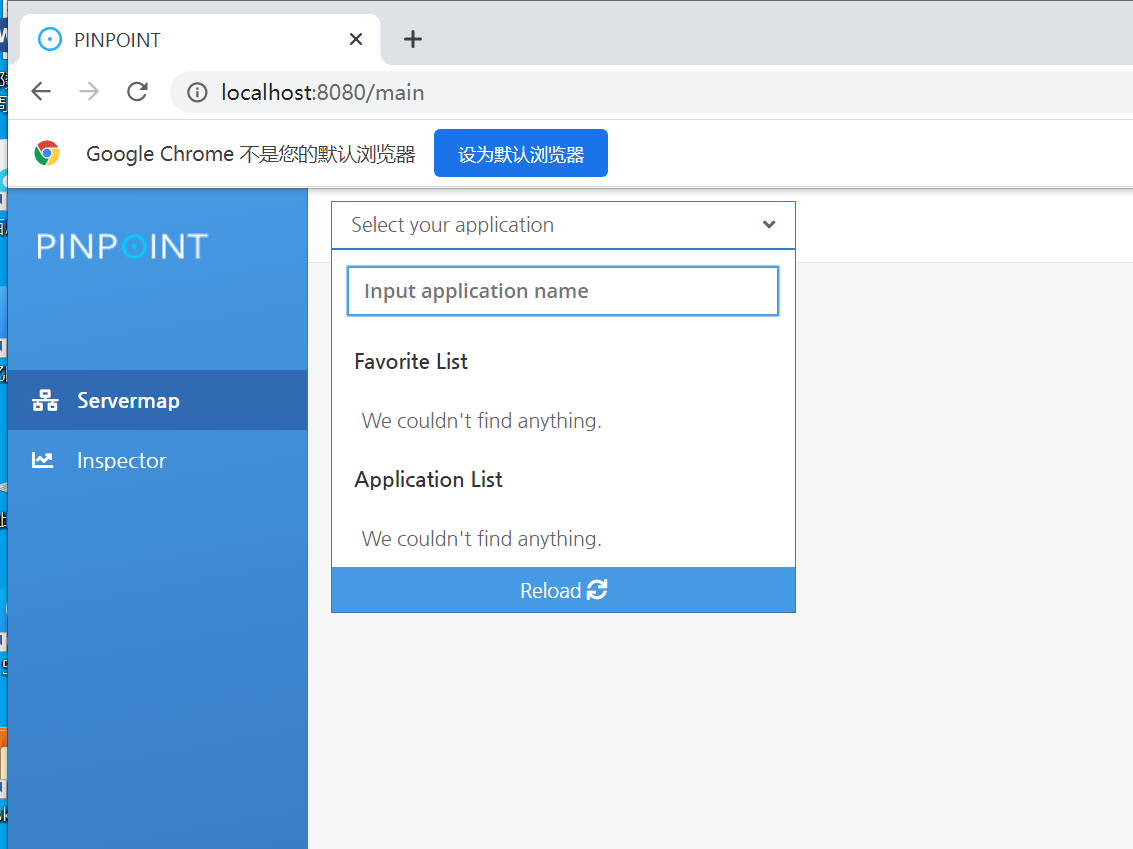
然后访问8080端口看是否启动成功:
http://localhost:8080/main
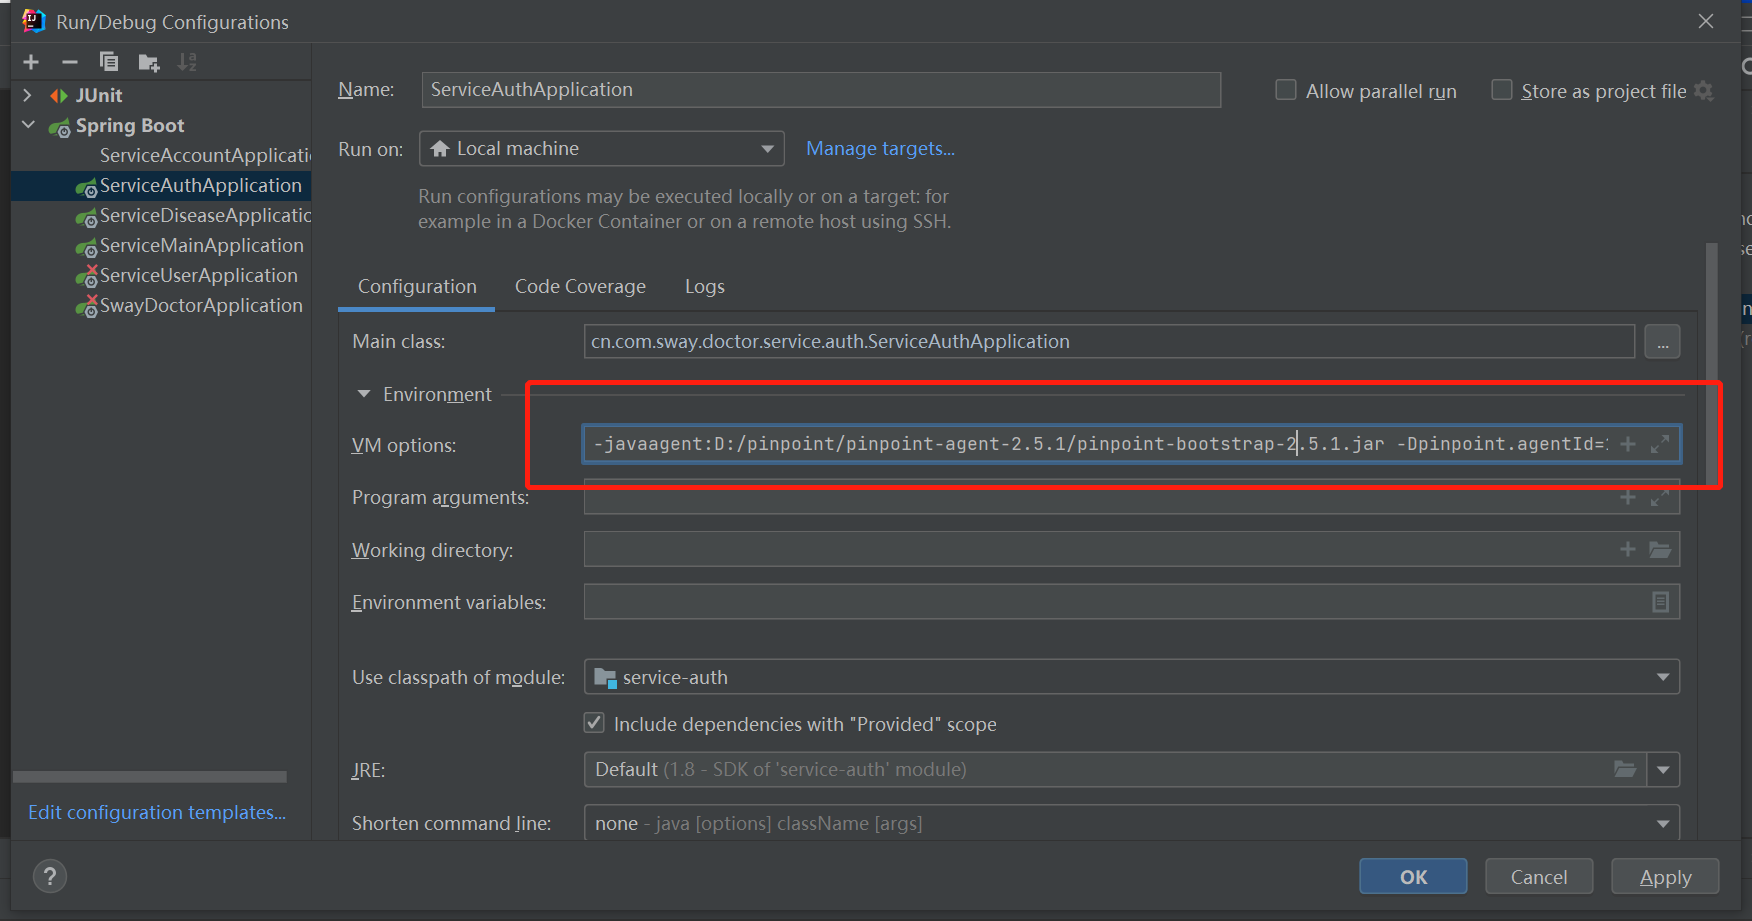
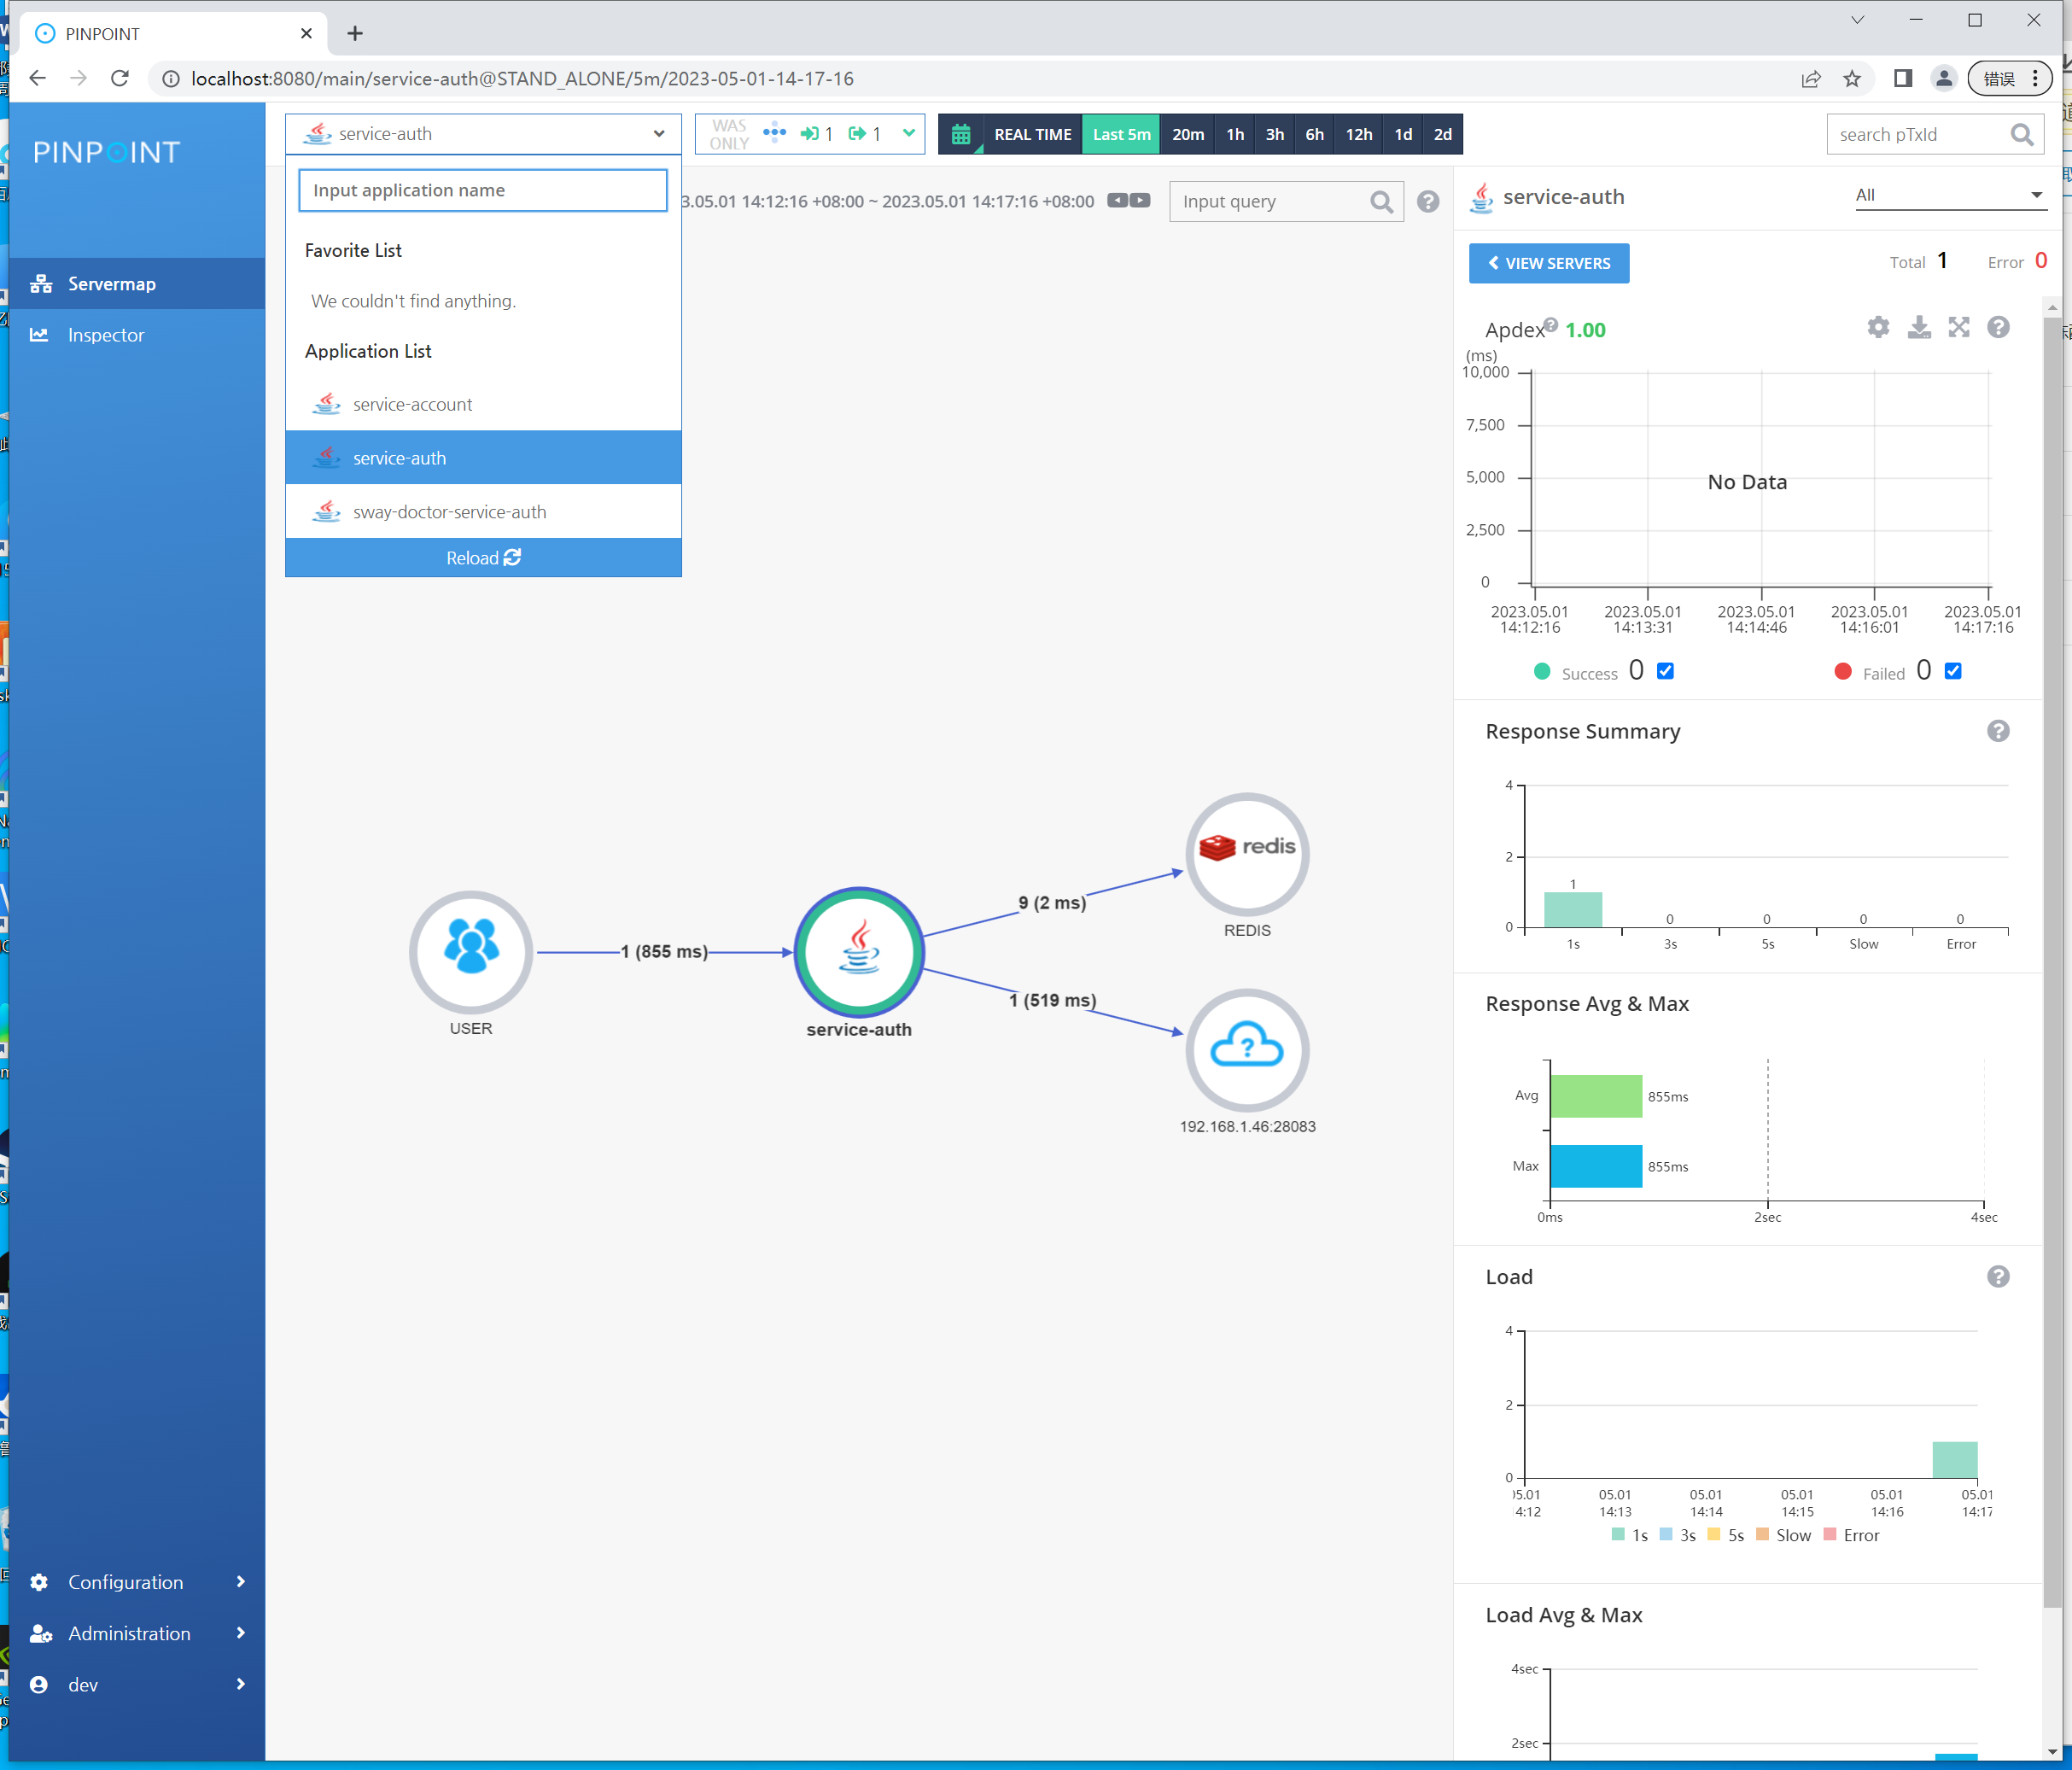
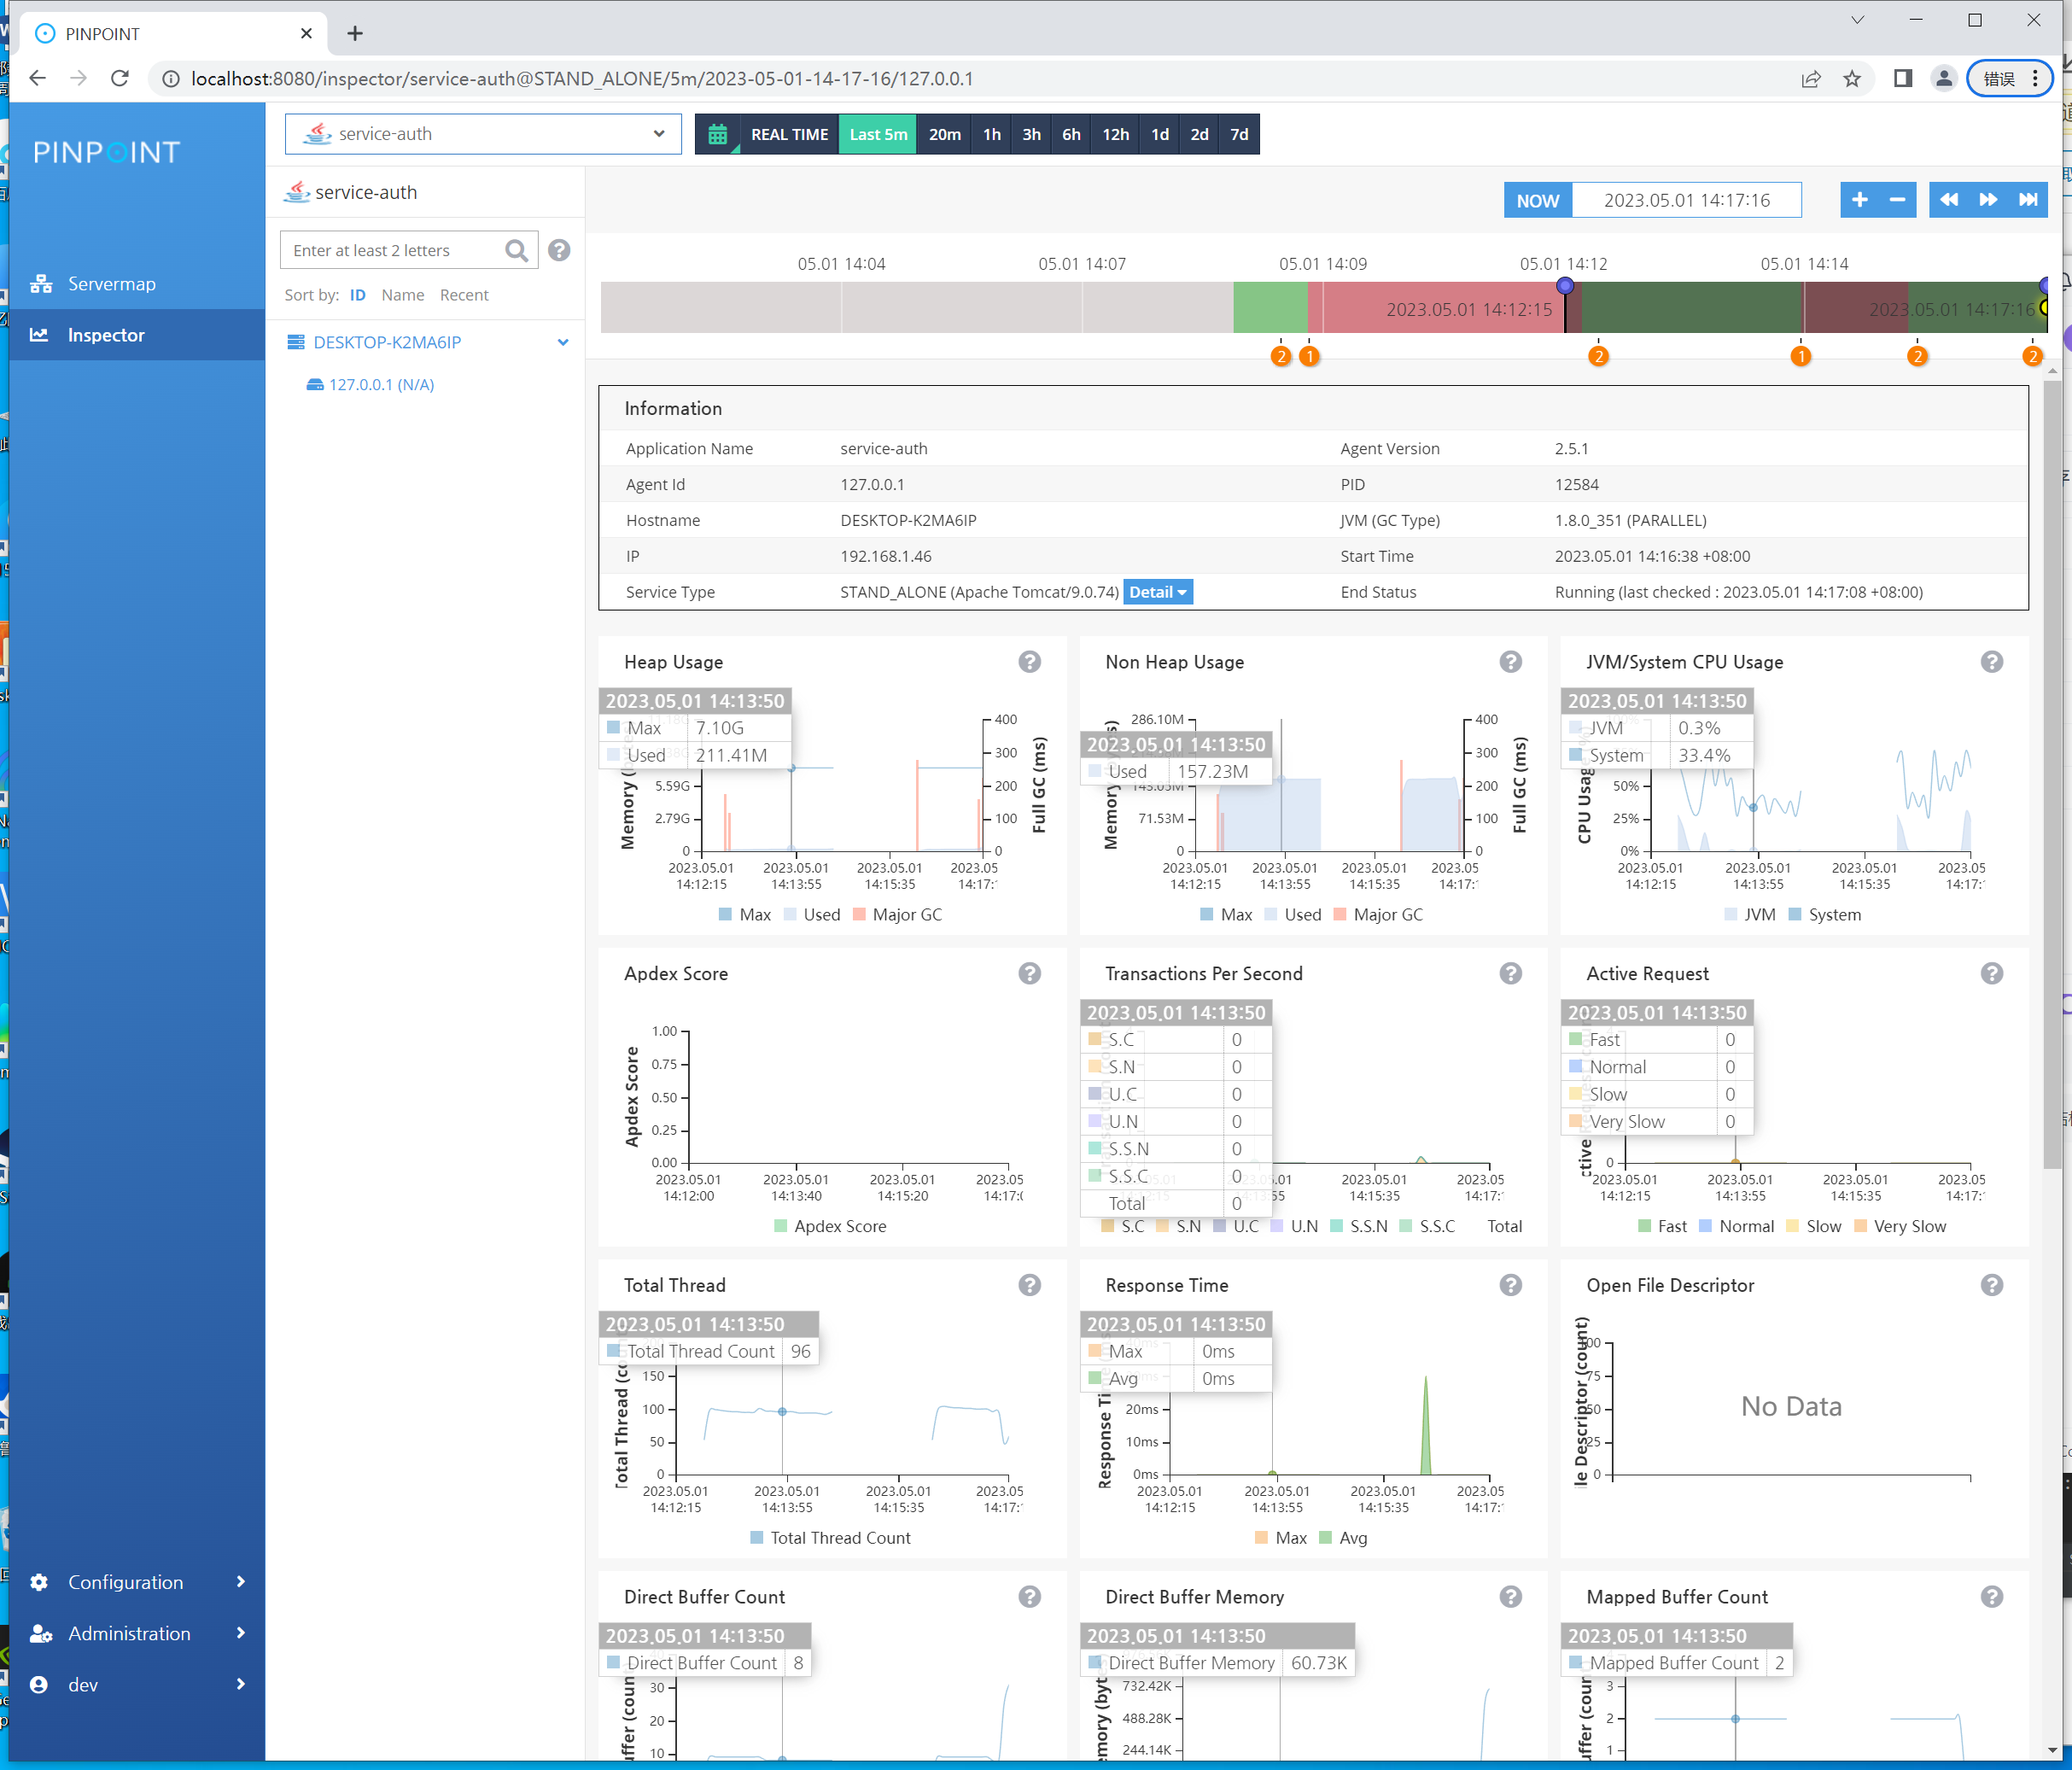
在idea中的springboot启动参数中增加如下vm设置:
-javaagent:D:/pinpoint/pinpoint-agent-2.5.1/pinpoint-bootstrap-2.5.1.jar -Dpinpoint.agentId=127.0.0.1 -Dpinpoint.applicationName=sway-doctor-service-auth
启动springboot项目,出现以下提示则为启动成功:
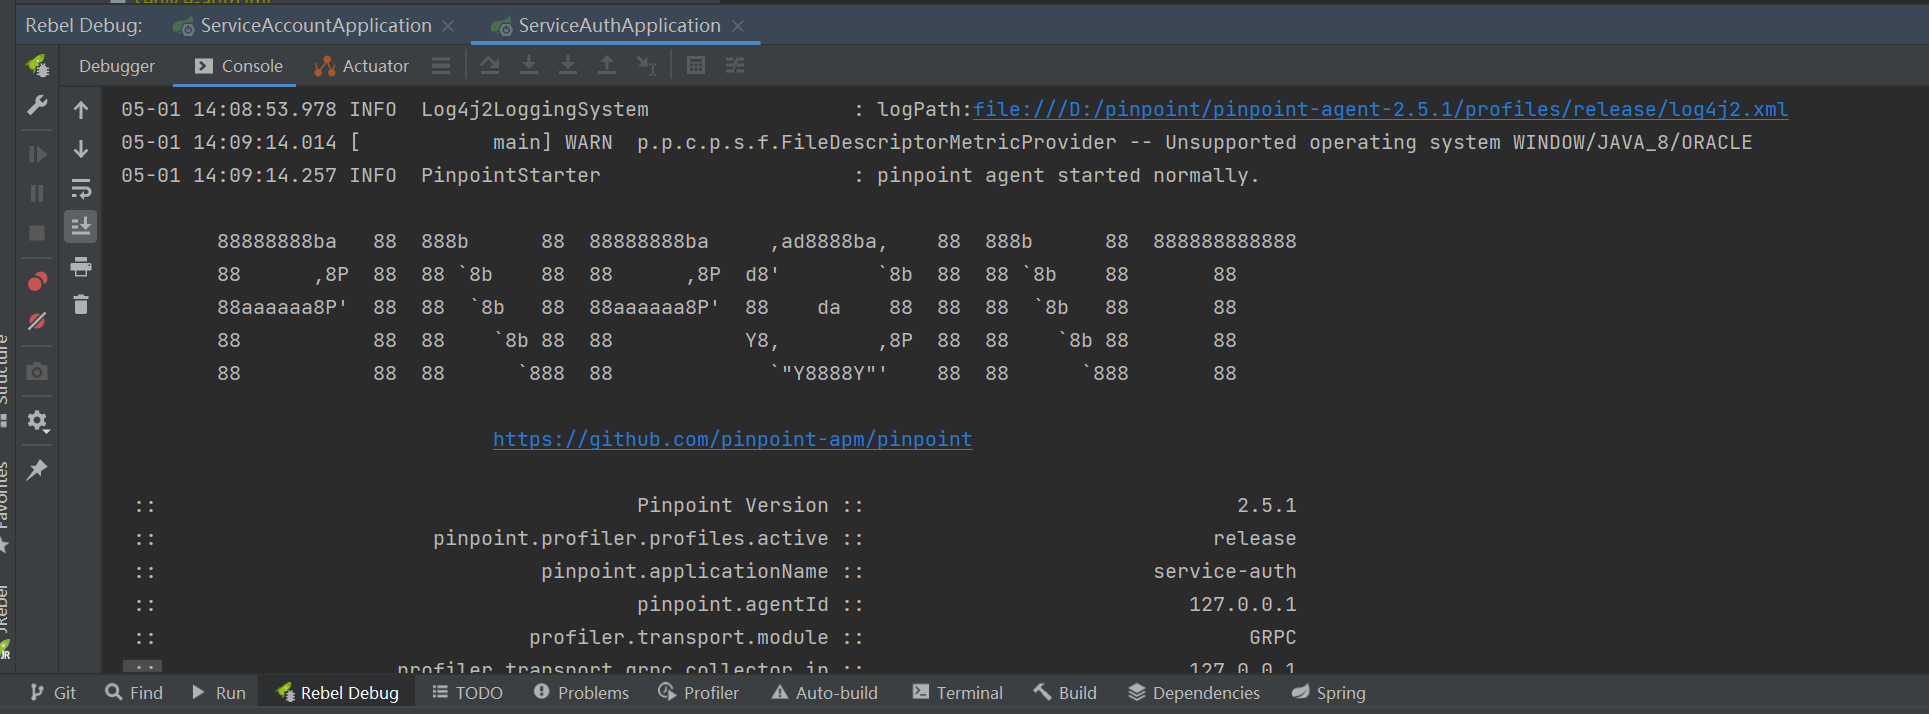
然后测试请求,并查看pinpoint的web管理界面,即可看见相关的应用:
Posted in 未分类
准备条件:已经安装jdk且已经配置了环境变量JAVA_HOME
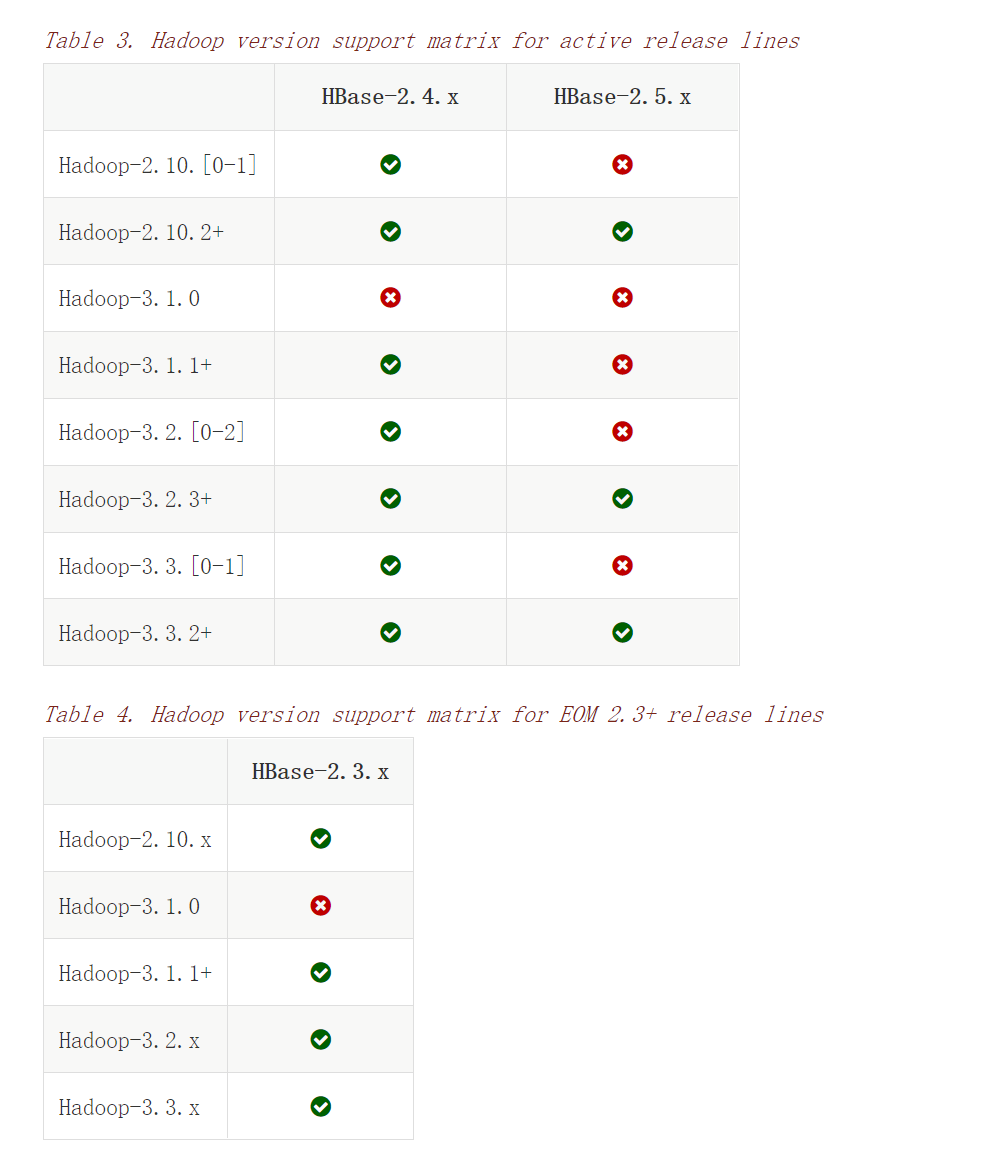
hadoop跟hbase的版本是有对应关系的,不能乱搭配,可以在这个网址里查看:
https://hbase.apache.org/book.html#java

https://www.apache.org/dyn/closer.cgi/hadoop/common/hadoop-3.1.1/hadoop-3.1.1.tar.gz
下载好后解压,这里以解压到d盘为例,则hadoop的路径为:
D:\hadoop-3.1.1
下载以下git路径下的所有文件并覆盖到hadoop安装目录的bin目录下的所有文件:
有很多个版本,请自行选择:
https://github.com/steveloughran/winutils/tree/master/hadoop-3.0.0/bin
https://github.com/selfgrowth/apache-hadoop-3.1.1-winutils
https://github.com/s911415/apache-hadoop-3.1.3-winutils
增加HADOOP_HOME为D:\hadoop-3.1.1
增加Path的以下两个环境变量:
1、%HADOOP_HOME%\bin
2、%HADOOP_HOME%\sbin
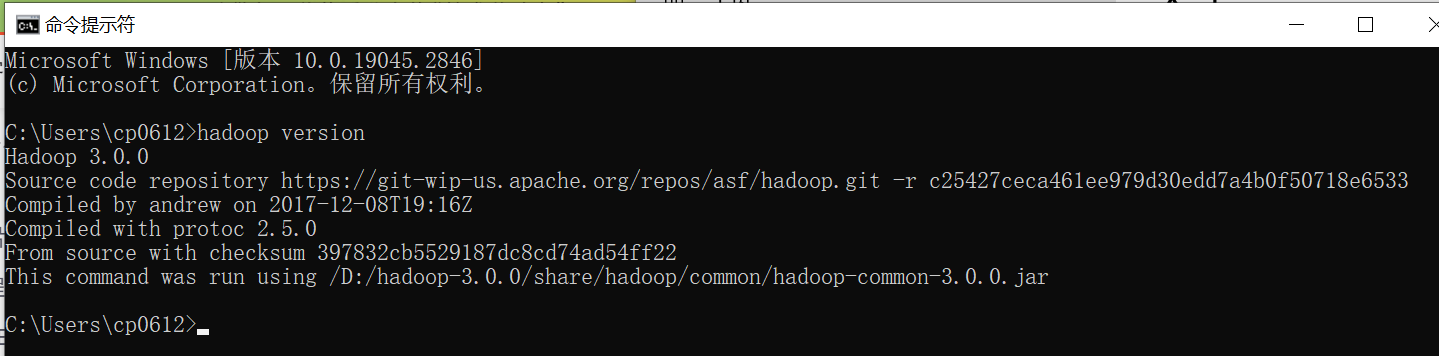
在CMD中使用hadoop version命令测试配置是否正常:

1、编辑etc\hadoop目录下的core-site.xml文件:
<configuration>
	<property>
        <name>hadoop.tmp.dir</name>
        <value>/D:/hadoop-3.1.1/workspace/tmp</value>
    </property>
    <property>
        <name>dfs.name.dir</name>
        <value>/D:/hadoop-3.1.1/workspace/name</value>
    </property>
    <property>
        <name>fs.default.name</name>
        <value>hdfs://localhost:9000</value>
    </property>
</configuration>
2、编辑etc\hadoop目录下的hdfs-site.xml文件:
<configuration>
    <property>
        <name>dfs.replication</name>
        <value>1</value>
    </property>
    <property>
        <name>dfs.data.dir</name>
        <value>/D:/hadoop-3.1.1/workspace/data</value>
    </property>
</configuration>
3、编辑etc\hadoop目录下的mapred-site.xml文件:
<configuration>
	<property>
		<name>mapreduce.framework.name</name>
		<value>yarn</value>
	</property>
	<property>
		   <name>mapred.job.tracker</name>
		   <value>hdfs://localhost:9001</value>
	</property>
</configuration>
4、编辑etc\hadoop目录下的yarn-site.xml文件:
<configuration>
   <property>
       <name>yarn.nodemanager.aux-services</name>
       <value>mapreduce_shuffle</value>
    </property>
    <property>
       <name>yarn.nodemanager.aux-services.mapreduce.shuffle.class</name>
       <value>org.apache.hadoop.mapred.ShuffleHandler</value>
    </property>
</configuration>
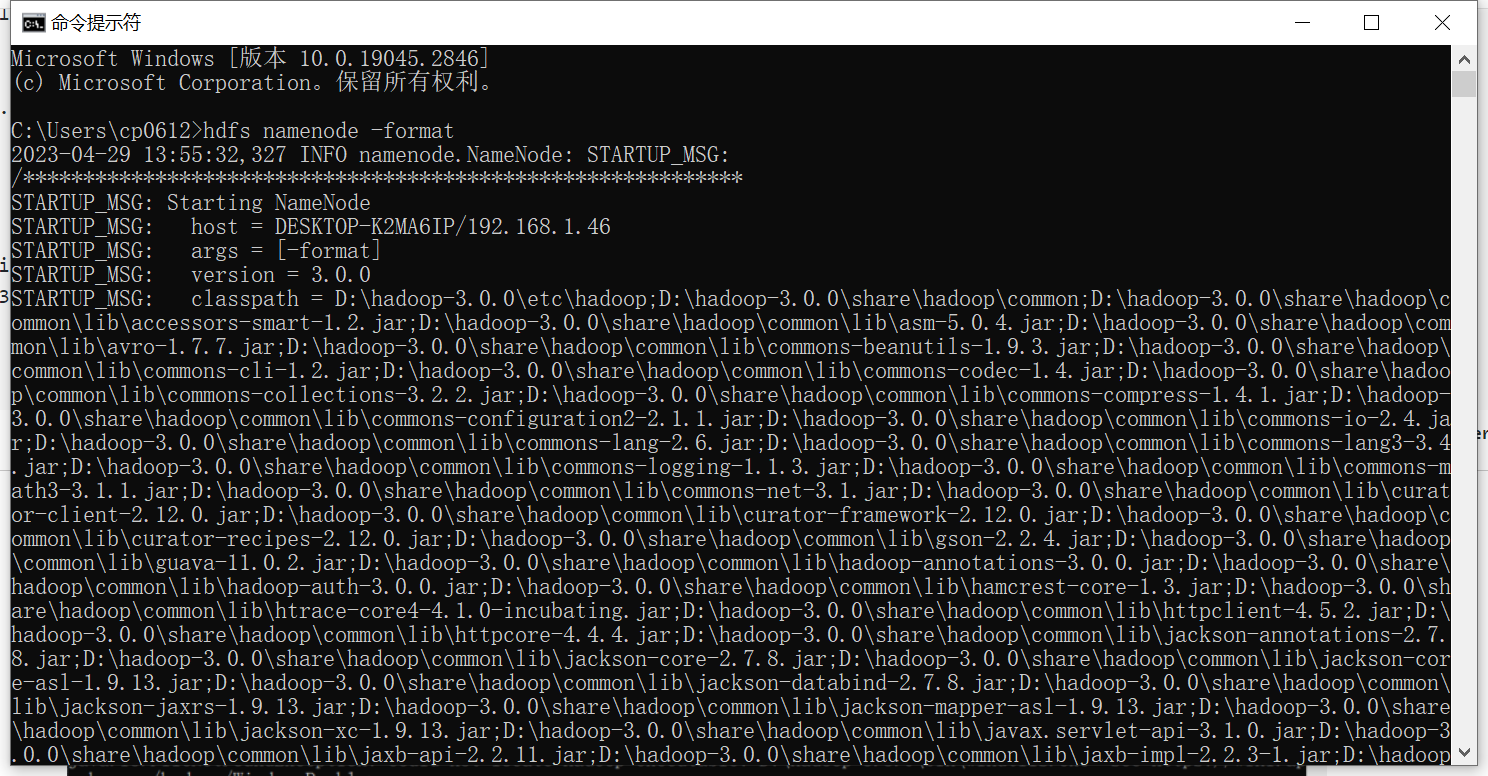
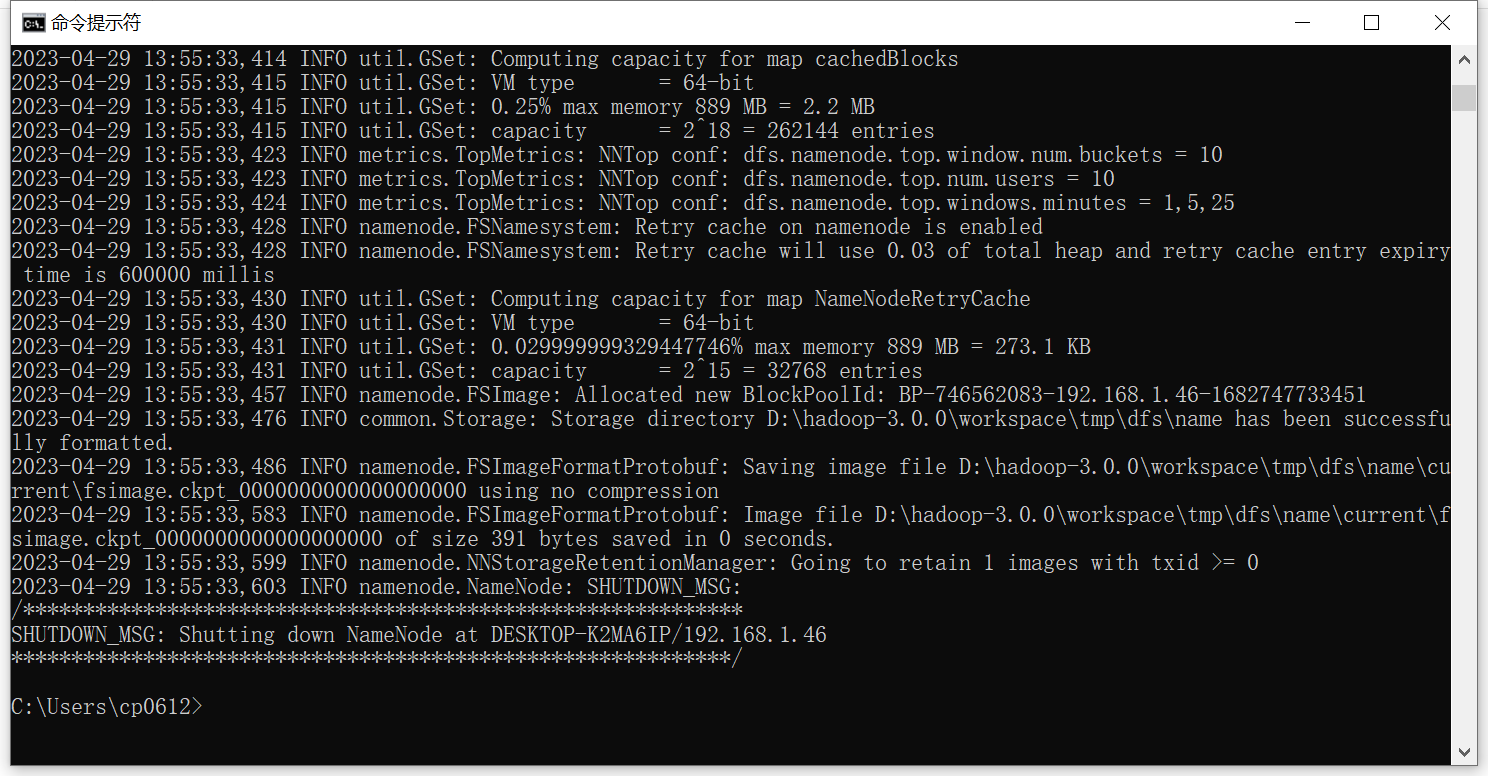
在cmd窗口执行命令:hdfs namenode -format
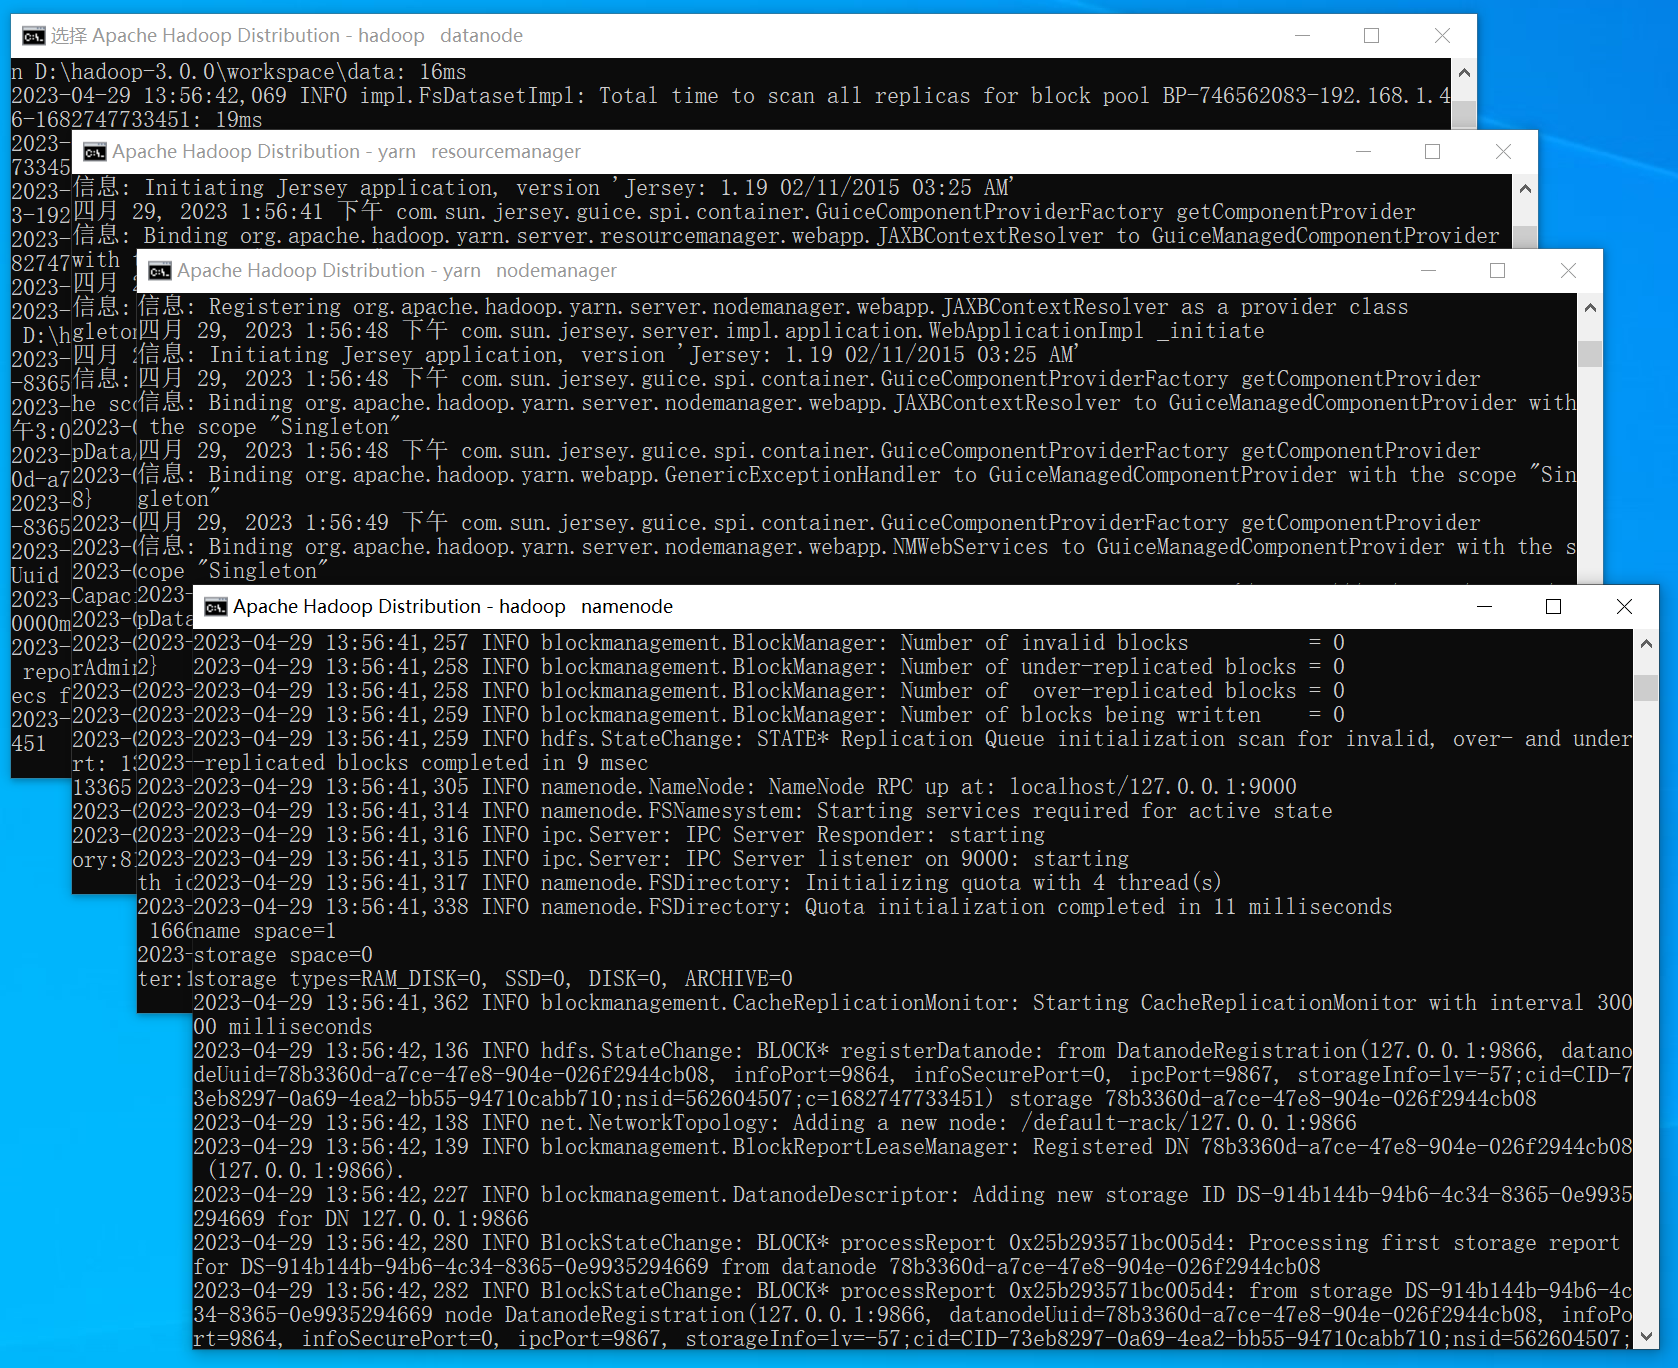
进入Hadoop的sbin目录下执行start-dfs.cmd启动Hadoop:
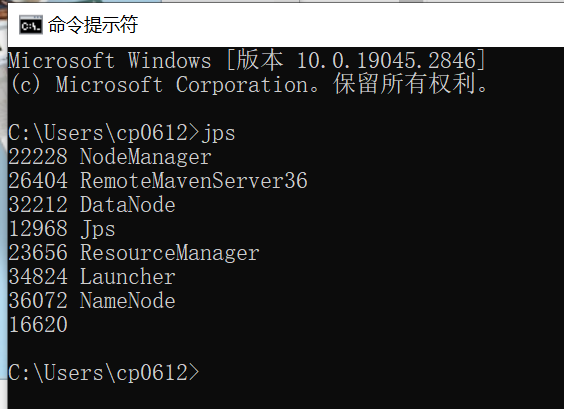
使用jdk的jps工具查看相关的hadoop进程是否启动车成功:
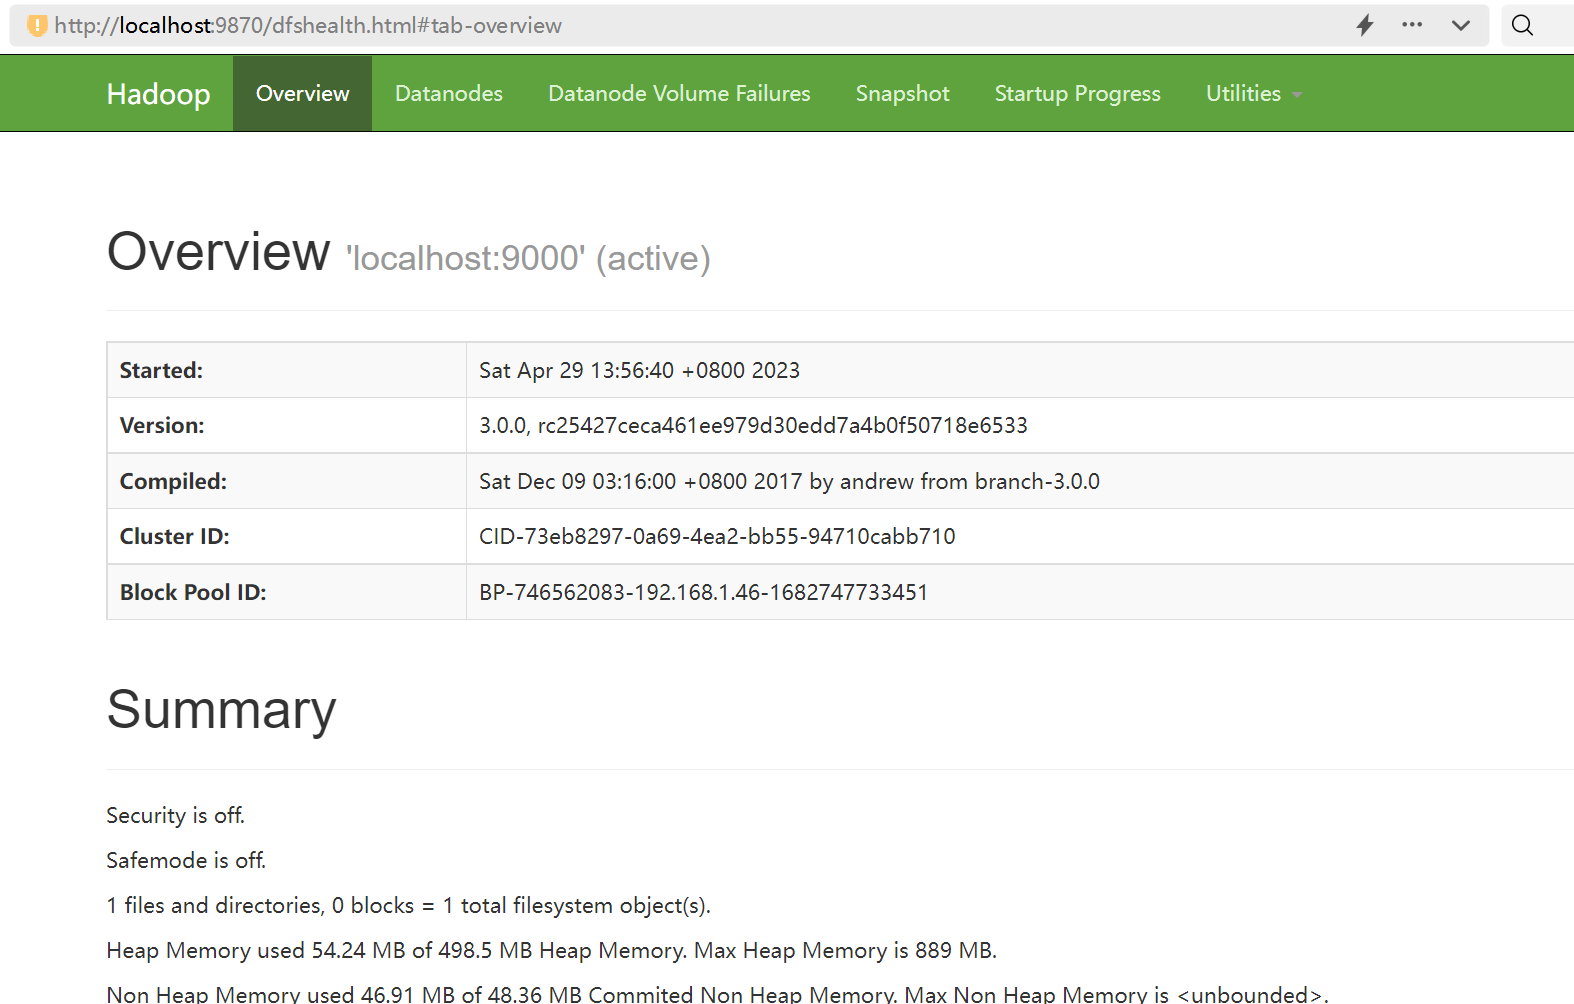
访问:http://localhost:9870
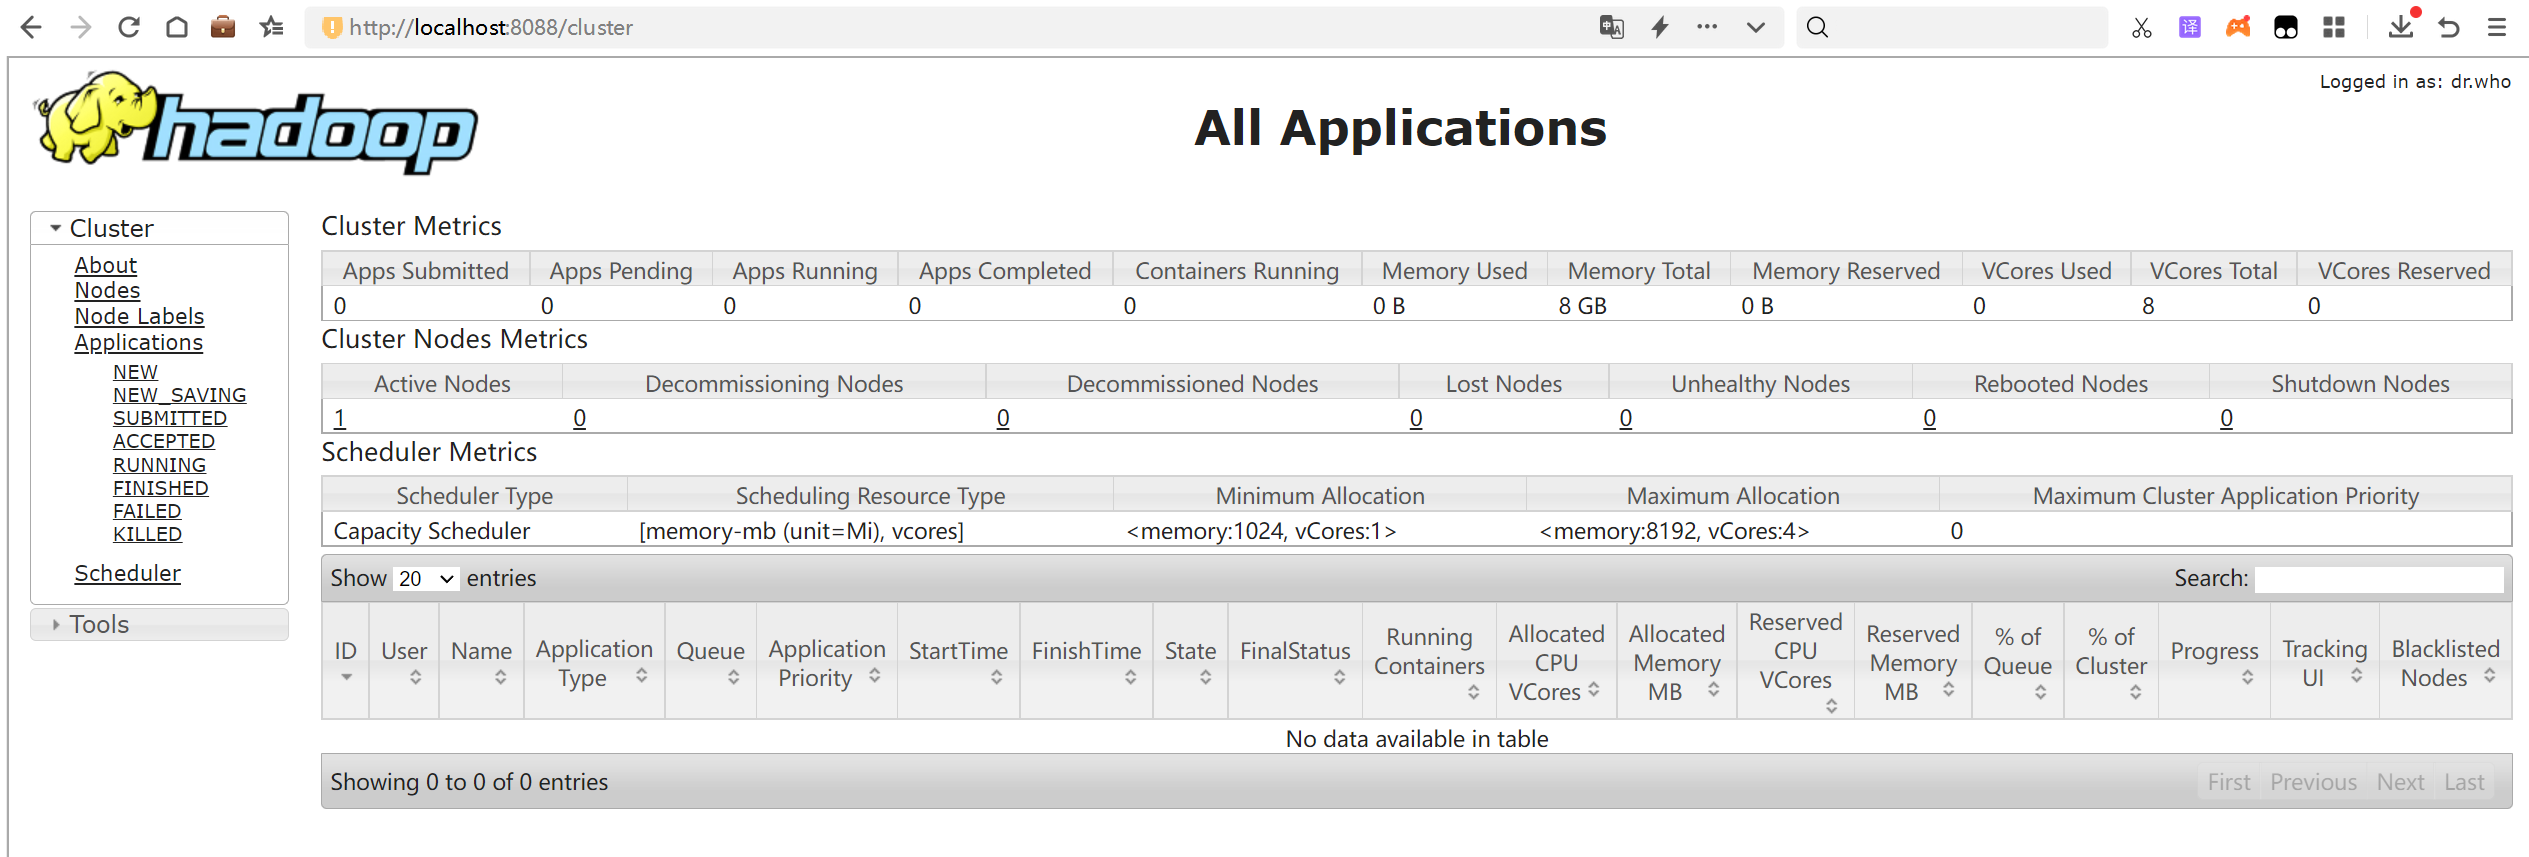
访问:http://localhost:8088
https://hbase.apache.org/downloads.html
或
https://archive.apache.org/dist/hbase/
此处教程的存放目录是:D:\hbase-2.2.6\
HBASE_HOME:D:\hbase-2.4.17
HBASE_CLASSPATH:D:\hbase-2.4.17\conf
HBASE_BIN_PATH:D:\hbase-2.4.17\bin

添加path环境变量:%HBASE_HOME%\bin

(1)conf\hbase-env.cmd文件:
JAVA_HOME=D:\Java\jdk1.8.0_351
HBASE_MANAGES_ZK=true
(2)conf\hbase-site.xml
<configuration>
    <property>
        <name>hbase.cluster.distributed</name>
        <value>false</value>
    </property>
	<property>
        <name>hbase.tmp.dir</name>
        <value>/D:/hbase-2.2.6/tmp</value>
    </property>
    <property>
        <name>hbase.rootdir</name>
        <value>hdfs://localhost:9000/hbase</value>
    </property>
    <property>
        <name>hbase.zookeeper.quorum</name>
        <value>127.0.0.1</value>
    </property>
    <property>
        <name>hbase.zookeeper.property.dataDir</name>
        <value>/D:/hbase-2.2.6/zoo</value>
    </property>
    <property>
        <name>hbase.unsafe.stream.capability.enforce</name>
        <value>false</value>
    </property>
</configuration>
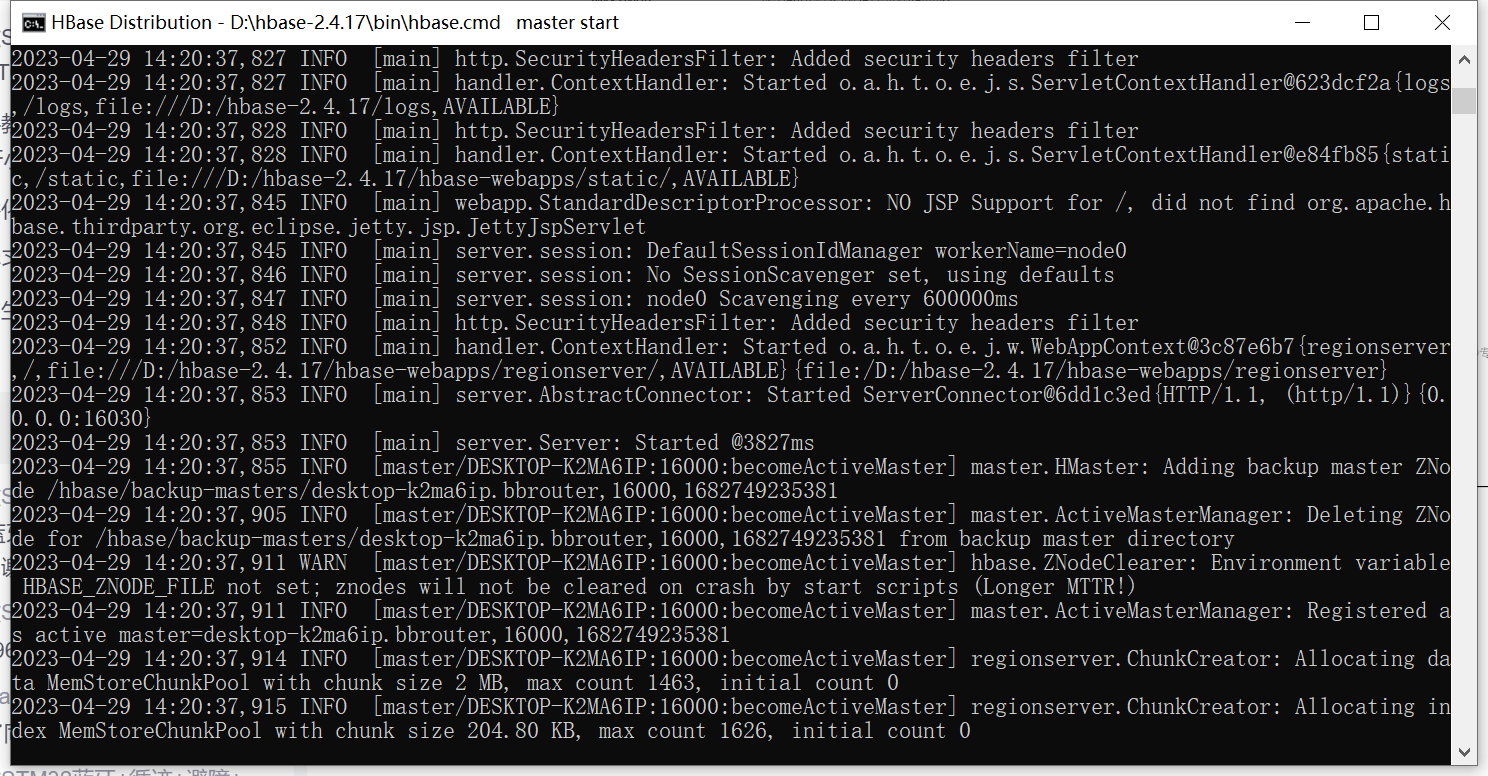
运行:bin\start-hbase.cmd
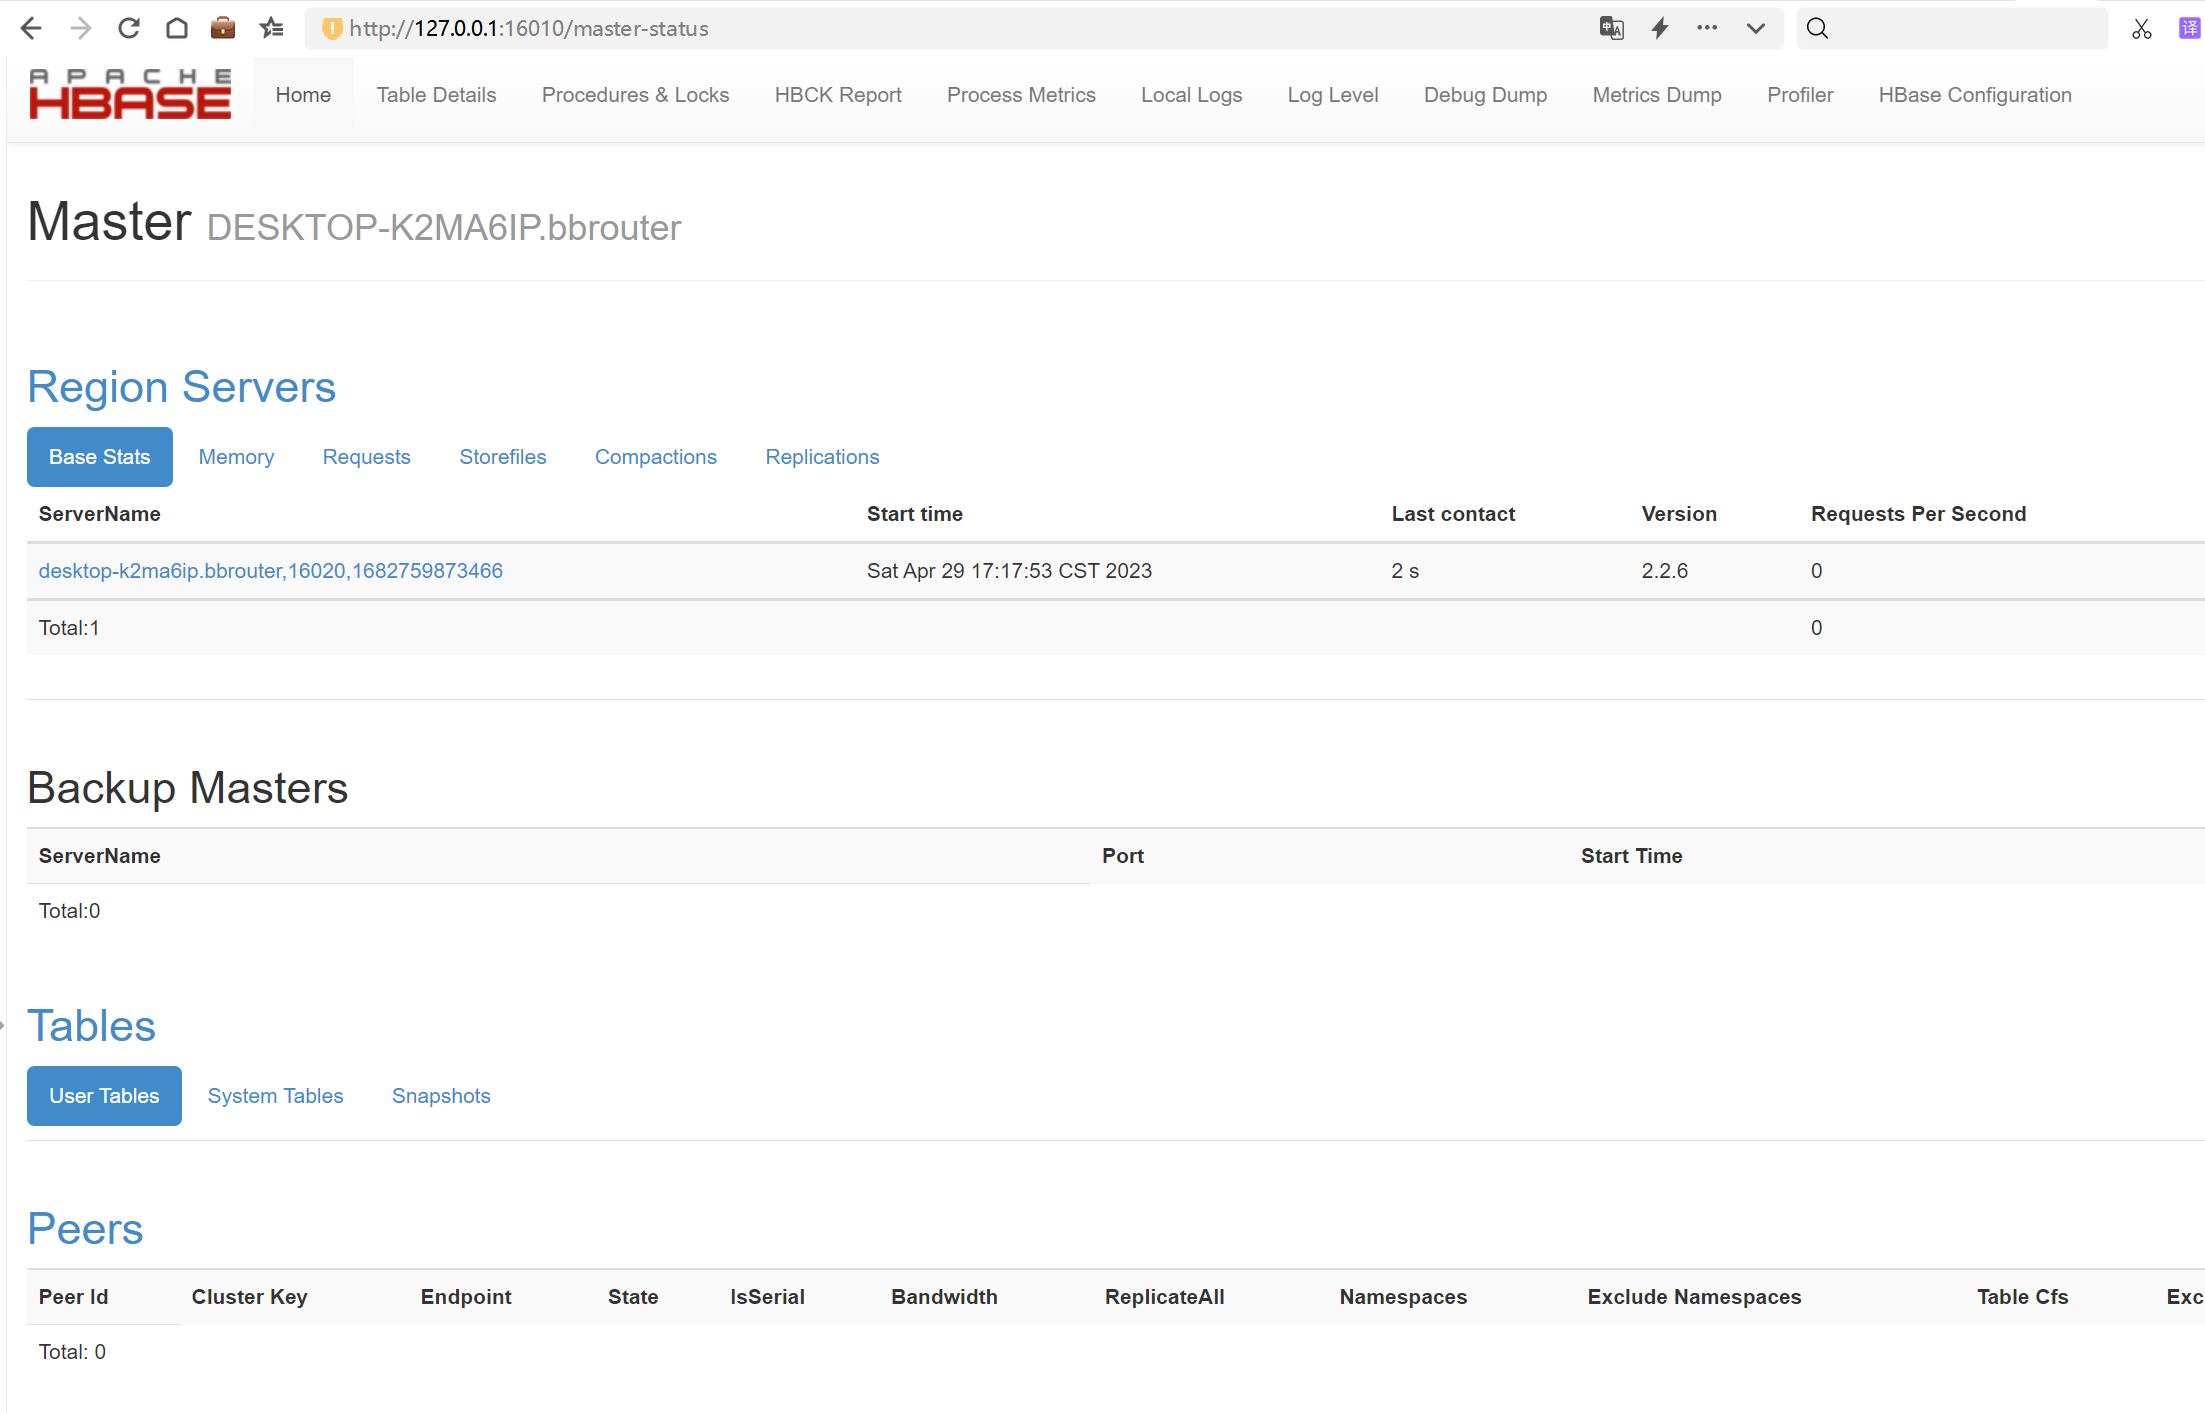
http://127.0.0.1:16010/master-status
执行:hbase shell

使用以下命令创建数据表测试是否正常:
create 'student','Sname','Ssex','Sage','Sdept','course'

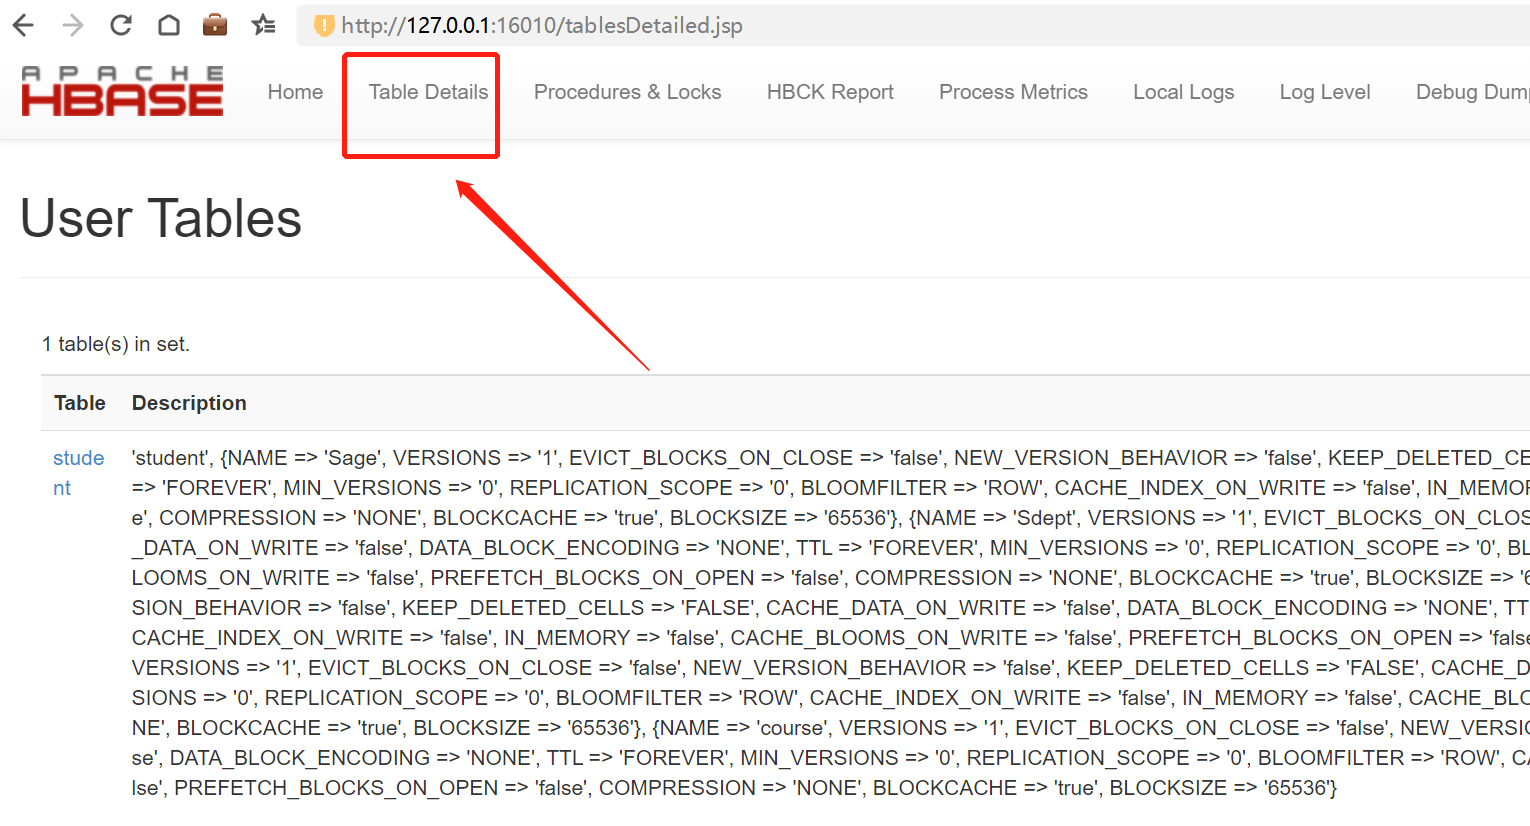
到此结束,享受您的大数据开发之旅吧!
如果运行start-hbase后hadoop和hbase出现“could only be written to 0 of the 1 minReplication nodes,there are 0 datanode(s) running”,一般是配置文件的data目录配置错误,则可以采取如下办法解决:
1、先用stop-all脚本关闭所有hadoop服务
2、删除hadoop的logs目录和data数据(配置文件里的tmp和data目录)
3、检查hdfs-site.xml配置文件
4、重新执行hdfs格式化命令:hadoop namenode -format
5、使用start-all启动hadoop
6、再次使用start-hbase命令启动hbase即可
启动hbase出现“Master startup cannot progress, in holding-pattern until region onlined.”提示:

则可以采取暴力删除所有节点的方式,即删除hbase中的zoo目录后重启即可,或使用以下命令删除也可以:hbase zkcli -server localhost:2181(未测试)
无法运行hbase shell命令,出现如下提示:

运行hbase shell提示:java.lang.NoClassDefFoundError: Could not initialize class org.fusesource.jansi.internal.Kernel32
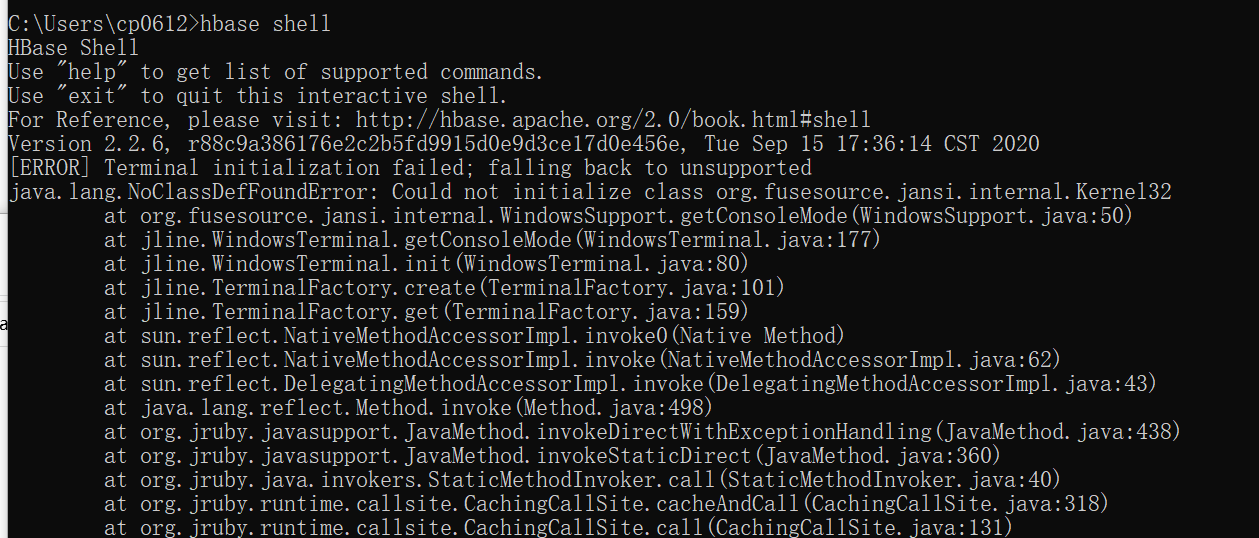
到这里 https://mvnrepository.com/artifact/org.fusesource.jansi/jansi/1.4 下载jar包放进去hbase的lib目录中即可。
如果你遇到Please check the config value of ‘hbase.wal.dir’ and ensure it points to a FileSystem mount that has suitable capabilities for output streams
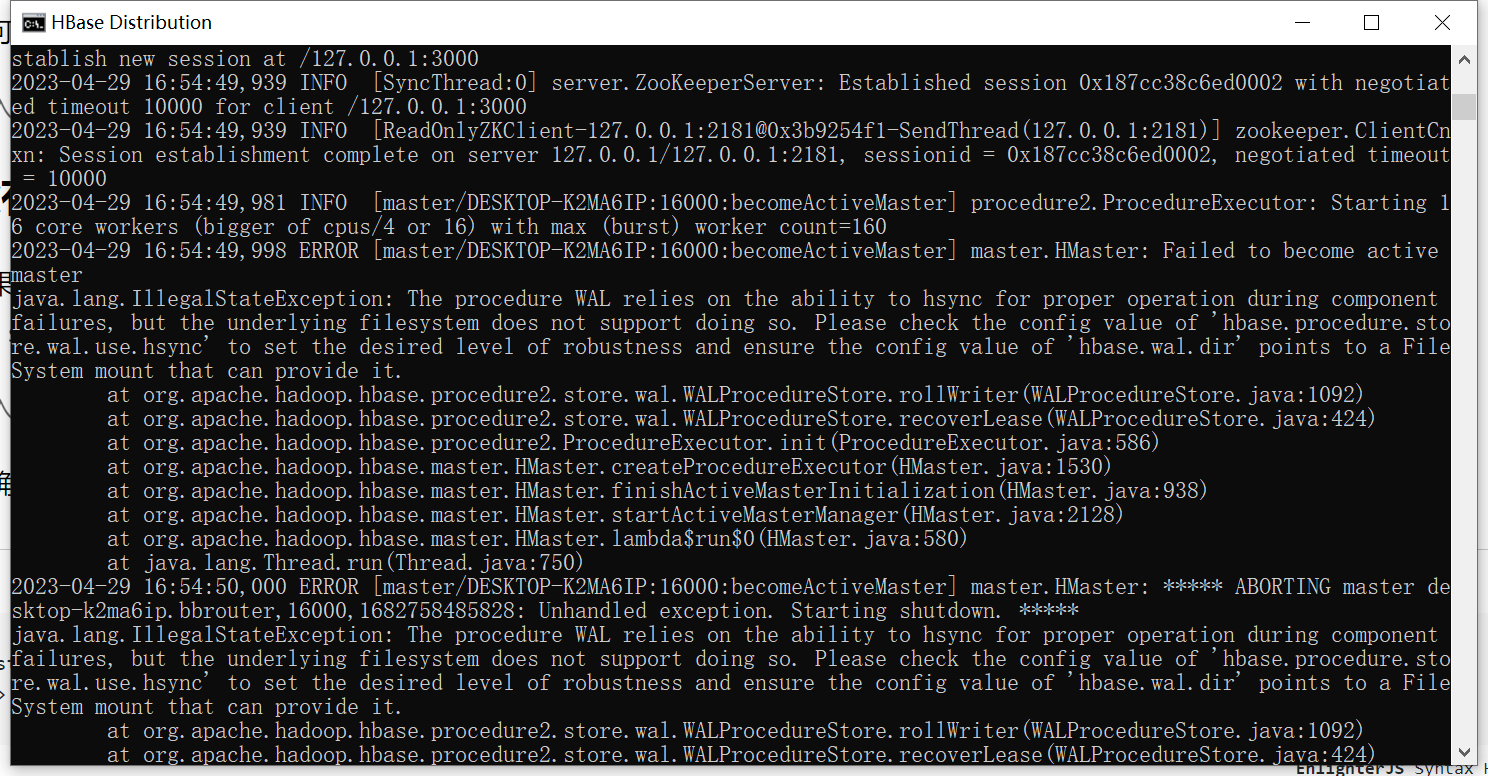
请确保hbase-site.xml中有如下配置:
	<property>
		<name>hbase.unsafe.stream.capability.enforce</name>
		<value>false</value>
	</property>
Posted in 未分类
dubbo的默认缓存文件是在{user.home}/.dubbo/目录下,默认会跟进提供者和消费者生成一些文件。如果在同一台机器上运行多个dubbo项目,则会报此错误。
解决办法是在SpringBoot启动类中加入如下代码,修改dubbo的缓存文件为jar包所在的位置:
@SpringBootApplication
public class ServiceUserApplication {

    public static void main(String[] args) {

        ApplicationHome home = new ApplicationHome(ServiceUserApplication.class);
        File jarFile = home.getSource();
        String dirPath = jarFile.getParentFile().toString();
        String filePath = dirPath + File.separator + ".dubbo";
        System.out.println(filePath);

        System.setProperty("dubbo.meta.cache.filePath", filePath);
        System.setProperty("dubbo.mapping.cache.filePath",filePath);

        SpringApplication.run(ServiceUserApplication.class, args);

    }

}
Posted in 未分类
第一步:引入Shiro-Redis依赖
注意:原来的Shiro依赖可以去掉了,默认的以下依赖已经集成了Shiro
        <!-- https://mvnrepository.com/artifact/org.crazycake/shiro-redis-spring-boot-starter -->
        <dependency>
            <groupId>org.crazycake</groupId>
            <artifactId>shiro-redis-spring-boot-starter</artifactId>
            <version>3.3.1</version>
        </dependency>
注入redisSessionDAO和redisCacheManager:
@Autowired
RedisSessionDAO redisSessionDAO;

@Autowired
RedisCacheManager redisCacheManager;
将它们注入您自己的SessionManager和SessionsSecurityManager:
    //权限管理,配置主要是Realm的管理认证(redis)
    @Bean
    public SessionManager sessionManager() {
        DefaultWebSessionManager sessionManager = new DefaultWebSessionManager();
        // inject redisSessionDAO
        sessionManager.setSessionDAO(redisSessionDAO);
        // other stuff...
        return sessionManager;
    }
    @Bean
    public DefaultWebSecurityManager securityManager(List<Realm> realms, SessionManager sessionManager) {
        DefaultWebSecurityManager securityManager = new DefaultWebSecurityManager(realms);
        //inject sessionManager
        securityManager.setSessionManager(sessionManager);
        // inject redisCacheManager
        securityManager.setCacheManager(redisCacheManager);
        // other stuff...
        return securityManager;
    }
| 标题 Title | 默认 Default | 说明 Description |
|---|---|---|
| shiro-redis.enabled | true | 启用 shiro-redis 的 Spring 模块 |
| shiro-redis.redis-manager.deploy-mode | standalone | Redis 部署模式。选项: standalone, sentinel, ‘集群’ |
| shiro-redis.redis-manager.host | 127.0.0.1:6379 | Redis 主机。如果您不指定主机,则默认值为127.0.0.1:6379. 如果你在哨兵模式或集群模式下运行 redis,用逗号分隔主机名,如127.0.0.1:26379,127.0.0.1:26380,127.0.0.1:26381 |
| shiro-redis.redis-manager.master-name | mymaster | 仅用于哨兵模式 Redis哨兵模式的主节点 |
| shiro-redis.redis-manager.timeout | 2000 | Redis 连接超时。jedis 尝试连接到 redis 服务器超时(以毫秒为单位) |
| shiro-redis.redis-manager.so-timeout | 2000 | 仅用于哨兵模式或集群模式 jedis尝试从redis服务器读取数据的超时时间 |
| shiro-redis.redis-manager.max-attempts | 3 | 仅用于集群模式 最大尝试连接到服务器 |
| shiro-redis.redis-manager.password | Redis密码 | |
| shiro-redis.redis-manager.database | 0 | Redis 数据库。默认值为 0 |
| shiro-redis.redis-manager.count | 100 | 扫描计数。Shiro-redis 使用 Scan 来获取键,因此您可以定义每次迭代返回的元素数量。 |
| shiro-redis.session-dao.expire | -2 | Redis 缓存键/值过期时间。过期时间以秒为单位。 特殊值: -1: no expire -2:与会话超时相同 默认值:-2 注意:确保过期时间长于会话超时。 |
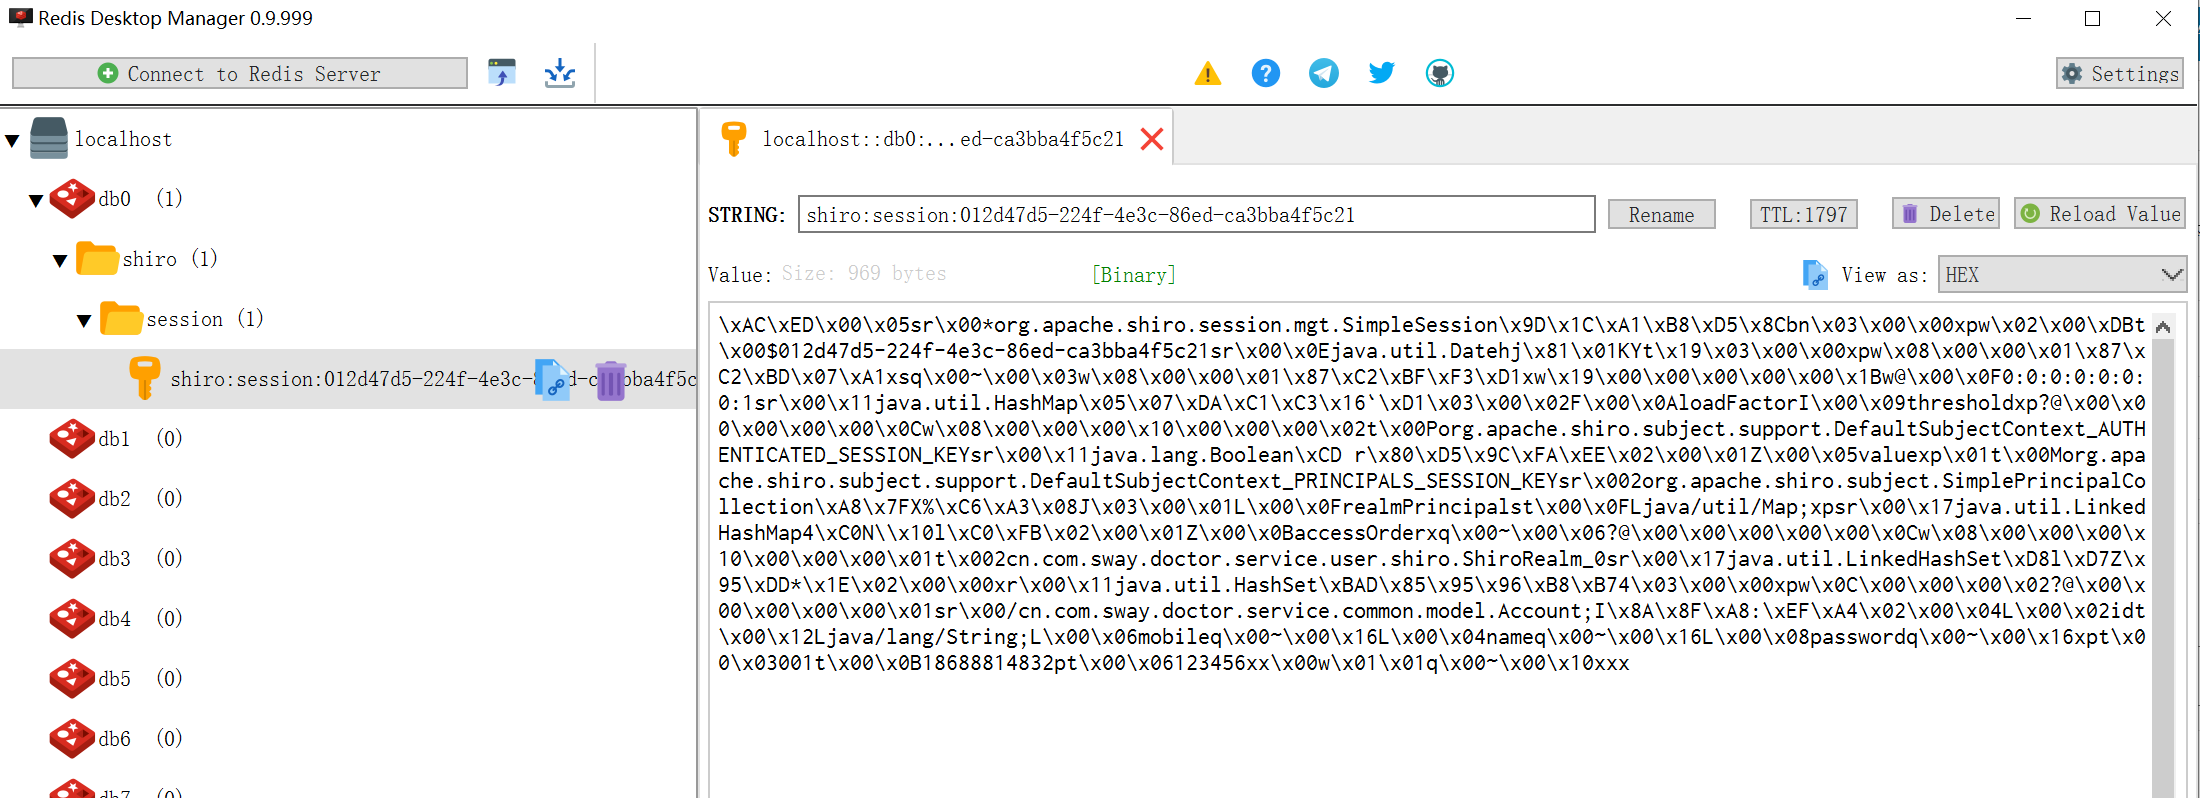
| shiro-redis.session-dao.key-prefix | shiro:session: | 为会话管理自定义您的 redis 密钥前缀 注意:请记住在前缀末尾添加冒号。 |
| shiro-redis.session-dao.session-in-memory-timeout | 1000 | 当我们登录时,doReadSession(sessionId)会被 shiro 调用大约 10 次。所以shiro-redis将Session保存在ThreadLocal中来缓解这个问题。sessionInMemoryTimeout 是 ThreadLocal 中 Session 的到期时间。 大多数情况下,您不需要更改它。 |
| shiro-redis.session-dao.session-in-memory-enabled | true | 是否在 ThreadLocal 中启用临时保存会话 |
| shiro-redis.cache-manager.principal-id-field-name | id | 主体 ID 字段名称。您可以获得唯一 ID 来标识此主体的字段。 例如,如果您使用 UserInfo 作为 Principal 类,则 id 字段可能id是userId、email、 等。 请记住将 getter 添加到此 id 字段。例如,getId(), getUserId(),getEmail()等。 默认值是id,这意味着您的主体对象必须有一个方法调用getId() |
| shiro-redis.cache-manager.expire | 1800 | Redis 缓存键/值过期时间。 过期时间以秒为单位。 |
| shiro-redis.cache-manager.key-prefix | shiro:cache: | 自定义您的 redis 键前缀以进行缓存管理 注意:请记住在前缀末尾添加冒号。 |
登录程工后在redis中会找到如下会话数据:
Posted in 未分类
        <!--shiro权限框架-->
        <dependency>
            <groupId>org.apache.shiro</groupId>
            <artifactId>shiro-spring</artifactId>
            <version>1.4.0</version>
        </dependency>
Account.java(账号)
package cn.com.sway.doctor.service.common.model;

import lombok.Data;

@Data
public class Account {

    private String id;
    private String mobile;
    private String password;
    private String name;

}
Role.java(角色)
package cn.com.sway.doctor.service.common.model;

public class Role {

    private String id;
    private String name;

}
Permission.java(权限)
package cn.com.sway.doctor.service.common.model;

public class Permission {

    private String id;
    private String name;

}
AuthMapper.java
package cn.com.sway.doctor.service.user.mapper;

import cn.com.sway.doctor.service.common.model.Account;
import org.apache.ibatis.annotations.Mapper;

import java.util.List;
import java.util.Map;

@Mapper
public interface AuthMapper {

    Account getAccountByMobile(String mobile);

    List<Map<String,Object>> getAccountPower(String mobile);

}
AuthMapper.xml
<?xml version="1.0" encoding="UTF-8" ?>
<!DOCTYPE mapper
        PUBLIC "-//mybatis.org//DTD Mapper 3.0//EN"
        "http://mybatis.org/dtd/mybatis-3-mapper.dtd">
<mapper namespace="cn.com.sway.doctor.service.user.mapper.AuthMapper">

    <!--通过手机号查找用户信息-->
    <select id="getAccountByMobile" resultType="cn.com.sway.doctor.service.common.model.Account" parameterType="String">
        SELECT *
        FROM account
        WHERE mobile=#{mobile}
    </select>

    <!--通过手机号查找用户权限信息-->
    <select id="getAccountPower" resultType="java.util.HashMap" parameterType="String">
        SELECT account.id, account.mobile, role.name AS role, permission.id AS permission
        FROM account,
             role,
             permission,
             account_role,
             role_permission
        WHERE account.mobile=#{mobile}
          AND account.id=account_role.accountId
          AND account_role.roleId=role.id
          AND role_permission.roleId=role.id
          AND role_permission.permissionId=permission.id
    </select>

</mapper>
AuthService.java
package cn.com.sway.doctor.service.user.service;

import cn.com.sway.doctor.service.common.model.Account;

import java.util.List;
import java.util.Map;

public interface AuthService {

    Account getAccountByMobile(String mobile);

    List<Map<String,Object>> getAccountPower(String mobile);

}
AuthServiceImpl.java
package cn.com.sway.doctor.service.user.service.impl;

import cn.com.sway.doctor.service.common.model.Account;
import cn.com.sway.doctor.service.user.mapper.AuthMapper;
import cn.com.sway.doctor.service.user.service.AuthService;
import org.springframework.beans.factory.annotation.Autowired;
import org.springframework.stereotype.Service;

import java.util.List;
import java.util.Map;

@Service
public class AuthServiceImpl implements AuthService {

    @Autowired
    AuthMapper authMapper;

    @Override
    public Account getAccountByMobile(String mobile) {
        return authMapper.getAccountByMobile(mobile);
    }

    @Override
    public List<Map<String, Object>> getAccountPower(String mobile) {
        return authMapper.getAccountPower(mobile);
    }
}
ShiroRealm.java
package cn.com.sway.doctor.service.user.shiro;

import cn.com.sway.doctor.service.common.model.Account;
import cn.com.sway.doctor.service.user.service.AuthService;
import org.apache.shiro.authc.AuthenticationException;
import org.apache.shiro.authc.AuthenticationInfo;
import org.apache.shiro.authc.AuthenticationToken;
import org.apache.shiro.authc.SimpleAuthenticationInfo;
import org.apache.shiro.authz.AuthorizationInfo;
import org.apache.shiro.authz.SimpleAuthorizationInfo;
import org.apache.shiro.realm.AuthorizingRealm;
import org.apache.shiro.subject.PrincipalCollection;
import org.springframework.beans.factory.annotation.Autowired;
import java.util.List;
import java.util.Map;

public class ShiroRealm extends AuthorizingRealm {

    @Autowired
    private AuthService loginService;

    /**
     * 获取权限
     * @param principalCollection
     * @return
     */
    @Override
    protected AuthorizationInfo doGetAuthorizationInfo(PrincipalCollection principalCollection) {

        //获取登录用户名
        String mobile = (String) principalCollection.getPrimaryPrincipal();
        //添加角色和权限
        SimpleAuthorizationInfo simpleAuthorizationInfo = new SimpleAuthorizationInfo();

        List<Map<String, Object>> powerList = loginService.getAccountPower(mobile);
        System.out.println(powerList.toString());
        for (Map<String, Object> powerMap : powerList) {
            //添加角色
            simpleAuthorizationInfo.addRole(String.valueOf(powerMap.get("role")));
            //添加权限
            simpleAuthorizationInfo.addStringPermission(String.valueOf(powerMap.get("permission")));
        }
        return simpleAuthorizationInfo;
    }

    /**
     * 登录认证
     * @param authenticationToken
     * @return
     * @throws AuthenticationException
     */
    @Override
    protected AuthenticationInfo doGetAuthenticationInfo(AuthenticationToken authenticationToken) throws AuthenticationException {
        //加这一步的目的是在Post请求的时候会先进认证,然后在到请求
        if (authenticationToken.getPrincipal() == null) {
            return null;
        }
        //获取用户唯一标识
        String mobile = authenticationToken.getPrincipal().toString();
        //根据用户名去数据库查询用户信息
        Account account = loginService.getAccountByMobile(mobile);
        if (account == null) {
            //这里返回后会报出对应异常
            return null;
        } else {
            //这里验证authenticationToken和simpleAuthenticationInfo的信息
            SimpleAuthenticationInfo simpleAuthenticationInfo = new SimpleAuthenticationInfo(account, account.getPassword(), getName());
            return simpleAuthenticationInfo;
        }
    }

}
ShiroConfig.java
package cn.com.sway.doctor.service.user.config;

import cn.com.sway.doctor.service.user.shiro.ShiroRealm;
import org.apache.shiro.spring.security.interceptor.AuthorizationAttributeSourceAdvisor;
import org.apache.shiro.spring.web.ShiroFilterFactoryBean;
import org.apache.shiro.web.mgt.DefaultWebSecurityManager;
import org.springframework.aop.framework.autoproxy.DefaultAdvisorAutoProxyCreator;
import org.springframework.boot.autoconfigure.condition.ConditionalOnMissingBean;
import org.springframework.context.annotation.Bean;
import org.springframework.context.annotation.Configuration;

@Configuration
public class ShiroConfig {
    @Bean
    @ConditionalOnMissingBean
    public DefaultAdvisorAutoProxyCreator defaultAdvisorAutoProxyCreator() {
        DefaultAdvisorAutoProxyCreator defaultAAP = new DefaultAdvisorAutoProxyCreator();
        defaultAAP.setProxyTargetClass(true);
        return defaultAAP;
    }

    //将自己的验证方式加入容器
    @Bean
    public ShiroRealm shiroRealm() {
        ShiroRealm shiroRealm = new ShiroRealm();
        return shiroRealm;
    }

    //权限管理,配置主要是Realm的管理认证
    @Bean
    public DefaultWebSecurityManager securityManager() {
        DefaultWebSecurityManager securityManager = new DefaultWebSecurityManager();
        securityManager.setRealm(shiroRealm());
        return securityManager;
    }

    //shiro核心过滤器
    @Bean("shiroFilter")
    public ShiroFilterFactoryBean shirFilter(DefaultWebSecurityManager securityManager) {
        ShiroFilterFactoryBean shiroFilter = new ShiroFilterFactoryBean();
        shiroFilter.setSecurityManager(securityManager);
        return shiroFilter;
    }

    @Bean
    public AuthorizationAttributeSourceAdvisor authorizationAttributeSourceAdvisor(DefaultWebSecurityManager securityManager) {
        AuthorizationAttributeSourceAdvisor authorizationAttributeSourceAdvisor = new AuthorizationAttributeSourceAdvisor();
        authorizationAttributeSourceAdvisor.setSecurityManager(securityManager);
        return authorizationAttributeSourceAdvisor;
    }
}
account表:
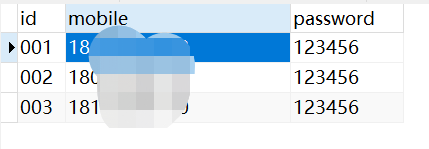
/*
 Navicat Premium Data Transfer

 Source Server         : localhost
 Source Server Type    : MySQL
 Source Server Version : 50623
 Source Host           : localhost:3306
 Source Schema         : sway-doctor-service-user

 Target Server Type    : MySQL
 Target Server Version : 50623
 File Encoding         : 65001

 Date: 24/04/2023 22:12:38
*/

SET NAMES utf8mb4;
SET FOREIGN_KEY_CHECKS = 0;

-- ----------------------------
-- Table structure for account
-- ----------------------------
DROP TABLE IF EXISTS `account`;
CREATE TABLE `account`  (
  `id` varchar(255) CHARACTER SET utf8 COLLATE utf8_general_ci NOT NULL,
  `mobile` varchar(255) CHARACTER SET utf8 COLLATE utf8_general_ci NULL DEFAULT NULL,
  `password` varchar(255) CHARACTER SET utf8 COLLATE utf8_general_ci NULL DEFAULT NULL,
  PRIMARY KEY (`id`) USING BTREE
) ENGINE = InnoDB CHARACTER SET = utf8 COLLATE = utf8_general_ci ROW_FORMAT = Compact;

SET FOREIGN_KEY_CHECKS = 1;
role表:
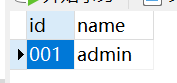
/*
 Navicat Premium Data Transfer

 Source Server         : localhost
 Source Server Type    : MySQL
 Source Server Version : 50623
 Source Host           : localhost:3306
 Source Schema         : sway-doctor-service-user

 Target Server Type    : MySQL
 Target Server Version : 50623
 File Encoding         : 65001

 Date: 24/04/2023 22:14:30
*/

SET NAMES utf8mb4;
SET FOREIGN_KEY_CHECKS = 0;

-- ----------------------------
-- Table structure for role
-- ----------------------------
DROP TABLE IF EXISTS `role`;
CREATE TABLE `role`  (
  `id` varchar(255) CHARACTER SET utf8 COLLATE utf8_general_ci NOT NULL,
  `name` varchar(255) CHARACTER SET utf8 COLLATE utf8_general_ci NULL DEFAULT NULL,
  PRIMARY KEY (`id`) USING BTREE
) ENGINE = InnoDB CHARACTER SET = utf8 COLLATE = utf8_general_ci ROW_FORMAT = Compact;

SET FOREIGN_KEY_CHECKS = 1;
permission表:
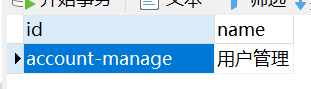
/*
 Navicat Premium Data Transfer

 Source Server         : localhost
 Source Server Type    : MySQL
 Source Server Version : 50623
 Source Host           : localhost:3306
 Source Schema         : sway-doctor-service-user

 Target Server Type    : MySQL
 Target Server Version : 50623
 File Encoding         : 65001

 Date: 24/04/2023 22:14:19
*/

SET NAMES utf8mb4;
SET FOREIGN_KEY_CHECKS = 0;

-- ----------------------------
-- Table structure for permission
-- ----------------------------
DROP TABLE IF EXISTS `permission`;
CREATE TABLE `permission`  (
  `id` varchar(255) CHARACTER SET utf8 COLLATE utf8_general_ci NOT NULL,
  `name` varchar(255) CHARACTER SET utf8 COLLATE utf8_general_ci NULL DEFAULT NULL,
  PRIMARY KEY (`id`) USING BTREE
) ENGINE = InnoDB CHARACTER SET = utf8 COLLATE = utf8_general_ci ROW_FORMAT = Compact;

SET FOREIGN_KEY_CHECKS = 1;
account_role表:
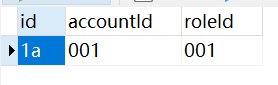
/*
 Navicat Premium Data Transfer

 Source Server         : localhost
 Source Server Type    : MySQL
 Source Server Version : 50623
 Source Host           : localhost:3306
 Source Schema         : sway-doctor-service-user

 Target Server Type    : MySQL
 Target Server Version : 50623
 File Encoding         : 65001

 Date: 24/04/2023 22:14:08
*/

SET NAMES utf8mb4;
SET FOREIGN_KEY_CHECKS = 0;

-- ----------------------------
-- Table structure for account_role
-- ----------------------------
DROP TABLE IF EXISTS `account_role`;
CREATE TABLE `account_role`  (
  `id` varchar(255) CHARACTER SET utf8 COLLATE utf8_general_ci NOT NULL,
  `accountId` varchar(255) CHARACTER SET utf8 COLLATE utf8_general_ci NULL DEFAULT NULL,
  `roleId` varchar(255) CHARACTER SET utf8 COLLATE utf8_general_ci NULL DEFAULT NULL,
  PRIMARY KEY (`id`) USING BTREE
) ENGINE = InnoDB CHARACTER SET = utf8 COLLATE = utf8_general_ci ROW_FORMAT = Compact;

SET FOREIGN_KEY_CHECKS = 1;
role_permission表:

/*
 Navicat Premium Data Transfer

 Source Server         : localhost
 Source Server Type    : MySQL
 Source Server Version : 50623
 Source Host           : localhost:3306
 Source Schema         : sway-doctor-service-user

 Target Server Type    : MySQL
 Target Server Version : 50623
 File Encoding         : 65001

 Date: 24/04/2023 22:14:36
*/

SET NAMES utf8mb4;
SET FOREIGN_KEY_CHECKS = 0;

-- ----------------------------
-- Table structure for role_permission
-- ----------------------------
DROP TABLE IF EXISTS `role_permission`;
CREATE TABLE `role_permission`  (
  `id` varchar(255) CHARACTER SET utf8 COLLATE utf8_general_ci NOT NULL,
  `roleId` varchar(255) CHARACTER SET utf8 COLLATE utf8_general_ci NULL DEFAULT NULL,
  `permissionId` varchar(255) CHARACTER SET utf8 COLLATE utf8_general_ci NULL DEFAULT NULL,
  PRIMARY KEY (`id`) USING BTREE
) ENGINE = InnoDB CHARACTER SET = utf8 COLLATE = utf8_general_ci ROW_FORMAT = Compact;

SET FOREIGN_KEY_CHECKS = 1;
package cn.com.sway.doctor.service.user.controller.api.v1;

import cn.com.sway.doctor.service.common.model.Account;
import cn.com.sway.doctor.service.common.query.AccountQuery;
import cn.com.sway.doctor.service.user.dao.AccountDao;
import org.apache.shiro.authz.annotation.*;
import org.springframework.beans.factory.annotation.Autowired;
import org.springframework.web.bind.annotation.*;

import java.util.List;

@RestController
@RequestMapping("/api/v1/accounts")
public class AccountsApiControllerV1 {

    @Autowired
    private AccountDao accountDao;

    //@RequiresAuthentication
    //@RequiresGuest
    //@RequiresUser
    @RequiresRoles("admin")
    //@RequiresPermissions("account-manage")
    @ResponseBody
    @GetMapping("")
    public String query() {

        AccountQuery accountQuery = new AccountQuery();
        List<Account> list = accountDao.query(accountQuery);

        System.out.println(accountDao.query(accountQuery).size());

        return "account total: "+list.size();
    }

}
Posted in 未分类