使用toFixed(2)
javascript小数点的bug简单解决方法
Nginx SSL+tomcat集群,request.getScheme() 取到https正确的协议
最近做的一个项目, 需要使用 tomcat 集群, 且项目需要使用https协议
但是,明明是https url请求, 但是java里的 request.getScheme() 的输出却是 http
request.getRequestURL() 输出出来的 一直是
http://xxxxxxxxx/abc?value=123
但是浏览器中的URL却是
https://xxxxxxxxx/abc?value=123
查阅了一些资料,找到了解决方案:
解决方法很简单,只需要分别配置一下 Nginx 和 Tomcat 就好了,而不用改程序。
配置 Nginx 的转发选项:
proxy_set_header       Host $host;
proxy_set_header  X-Real-IP  $remote_addr;
proxy_set_header  X-Forwarded-For $proxy_add_x_forwarded_for;
proxy_set_header X-Forwarded-Proto  $scheme;
配置Tomcat server.xml 的 Engine 模块下配置一个 Valve:
	<Valve className="org.apache.catalina.valves.RemoteIpValve"
                  remoteIpHeader="x-forwarded-for"
                  remoteIpProxiesHeader="x-forwarded-by"
                  protocolHeader="x-forwarded-proto"
                  protocolHeaderHttpsValue="https"/>
配置双方的 X-Forwarded-Proto 就是为了正确地识别实际用户发出的协议是 http 还是 https。
这样以上5项测试就都变为正确的结果了,就像用户在直接访问 Tomcat 一样。
参考资料:
http://www.th7.cn/Program/java/201608/929190.shtml
http://blog.csdn.net/pwq296306654/article/details/51760844
http://feitianbenyue.iteye.com/blog/2056357
使用nginx 反向代理实现负载均衡解决HTTPS 证书问题
由于项目需要 负载均衡由NBL 转成nginx 反向代理。考虑都是https模块,所以证书成了个难题。
解决方案:
1.下载openssl(windows 安装包)
2.打开bin/下面的openssl.exe
3.再原来的IIS上面把证书导出.pfx(域服务器证书申请,主要适用域内)
4.利用openssl 进行转化:
openssl pkcs12 -in server.pfx -nodes -out server.pem # 生成明文所有内容
openssl rsa -in server.pem -out server.key # 取 key 文件
openssl x509 -in server.pem -out server.crt # 取证书
5.nginx 上面开始配置:
upstream backend
{
#ip_hash;
server 10.1.0.245:81;
server 10.1.0.42:81;
}
    server {
        listen     80;
        listen     443 ssl;
        server_name  office.dahuatech.com;
        ssl_certificate      server.crt;
        ssl_certificate_key  server.key;
        #ssl_session_cache    shared:SSL:1m;
        ssl_session_timeout  5m;
        ssl_ciphers  HIGH:!aNULL:!MD5;
        #ssl_prefer_server_ciphers  on;
        #charset koi8-r;
        #access_log  logs/host.access.log  main;

      location / {
        proxy_pass  http://backend;
        #Proxy Settings
        proxy_redirect     off;
        proxy_set_header   Host             $host;
        proxy_set_header   X-Real-IP        $remote_addr;
        proxy_set_header   X-Forwarded-For  $proxy_add_x_forwarded_for;
        proxy_next_upstream error timeout invalid_header http_500 http_502 http_503 http_504;
        proxy_max_temp_file_size 0;
        proxy_connect_timeout      90;
        proxy_send_timeout         90;
        proxy_read_timeout         90;
        proxy_buffer_size          4k;
        proxy_buffers              4 32k;
        proxy_busy_buffers_size    64k;
        proxy_temp_file_write_size 64k;
        }
按照上面配置就可以。这样域内所有的用户都可以在信任证书内。
记录下 送给需要的人
OPENSSL 安装包下载:Win32OpenSSL-0_9_8l.zip
CentOS 6/7 下使用yum安装nginx
Ubuntu下安装nginx,直接apt-get install nginx就行了,很方便。
但是今天装了CentOS6.2,直接yum install nginx不行,要先处理下源,下面是安装完整流程,也十分简单:
1、运行并安装源:
CentOS 7 下使用这个命令
rpm -Uvh http://nginx.org/packages/centos/7/noarch/RPMS/nginx-release-centos-7-0.el7.ngx.noarch.rpm
CentOS 6 下使用这个命令
rpm -ivh http://nginx.org/packages/centos/6/noarch/RPMS/nginx-release-centos-6-0.el6.ngx.noarch.rpm
2,查看yum的nginx信息
[]# yum info nginx

Loaded plugins: fastestmirror

Determining fastest mirrors

 * base: mirror.esocc.com

 * extras: mirror.esocc.com

 * updates: mirror.esocc.com

base                                                     | 3.7 kB     00:00

base/primary_db                                          | 4.4 MB     00:28

extras                                                   | 3.5 kB     00:00

extras/primary_db                                        |  19 kB     00:00

nginx                                                    | 2.9 kB     00:00

nginx/primary_db                                         |  22 kB     00:00

updates                                                  | 3.5 kB     00:00

updates/primary_db                                       | 2.1 MB     00:10

Installed Packages

Name        : nginx

Arch        : x86_64

Version     : 1.4.0

Release     : 1.el6.ngx

Size        : 874 k

Repo        : installed

From repo   : nginx

Summary     : nginx is a high performance web server

URL         : http://nginx.org/

License     : 2-clause BSD-like license

Description : nginx [engine x] is an HTTP and reverse proxy server, as well as

            : a mail proxy server
3,安装nignx
[root@server ~]# yum install nginx
4,启动nginx
CentOS 7 下使用这个命令:
systemctl start nginx
CentOS 6 下使用这个命令
service nginx start
4,然后进入浏览器,输入http://xxxxxxx/测试,如果看到
Welcome to nginx!
If you see this page, the nginx web server is successfully installed and working. Further configuration is required.
For online documentation and support please refer to nginx.org.
Commercial support is available at nginx.com.
Thank you for using nginx.
恭喜你,你成功了!
5、设置为开机启动
CentOS 7 下使用这个命令
systemctl enable nginx.service
CentOS 6下使用这个命令
chkconfig nginx on
Intel酷睿i5-6500试用报告
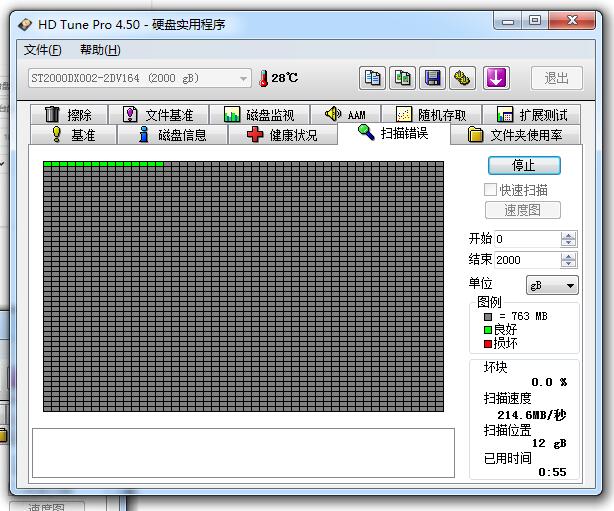
[个人试用]希捷酷玩混合固态硬盘(ST2000DX002)简单试用报告
Redirect apache to tomcat 8 with mod proxy
I’m trying to redirect Apache Webserver to Tomcat 8 in Ubuntu. Both of them are working properly but I can’t redirect from port 80 in Apache to Tomcat in 8080. My apps work un http://localhost:8080/cmsand myapp. I followed this. I tried also AJP mod but it didn’t work. I used a2enmod: a2enmod proxyand a2enmod proxy_http to enable modules.
This is my apache2/sites-available/000-default.conf.
<VirtualHost *:80>
ProxyRequests off
ProxyPreserveHost on

ServerAdmin webmaster@localhost
DocumentRoot /var/www/html

ErrorLog ${APACHE_LOG_DIR}/error.log
CustomLog ${APACHE_LOG_DIR}/access.log combined

ProxyPass         /myapp  http://localhost:8082/myapp
ProxyPassReverse  /myapp  http://localhost:8082/myapp

ProxyPass         /cms  http://localhost:8082/cms
ProxyPassReverse  /cms  http://localhost:8082/cms

</VirtualHost>
These are my servlet.xml connectors:
   <Connector port="8080" protocol="HTTP/1.1"
               connectionTimeout="20000"
               redirectPort="8443" />
    <Connector port="8082" proxyPort="80"/>
    <Connector port="8009" redirectPort="8443" protocol="AJP/1.3"/>
Using ProxyPass /cms http://localhost:8080/cms don’t work either.
Thanks in advance.
AngularJS入门教程:日期格式化
- 本地化日期格式化:
- ({{ today | date:’medium’ }})May 22, 2016 12:11:11 PM
- ({{ today | date:’short’ }})5/22/16 12:11 PM
- ({{ today | date:’fullDate’ }})Sunday, May 22, 2016
- ({{ today | date:’longDate’ }})May 22, 2016
- ({{ today | date:’mediumDate’ }})May 22, 2016
- ({{ today | date:’shortDate’ }})5/22/16
- ({{ today | date:’mediumTime’ }})12:11:11 PM
- ({{ today | date:’shortTime’ }})12:11 PM
- 年份格式化:
- 四位年份:({{ today | date:’yyyy’ }})2016
- 两位年份:({{ today | date:’yy’ }})16
- 一位年份:({{ today | date:’y’ }})2016
- 月份格式化:
- 英文月份:({{ today | date:’MMMM’ }})May
- 英文月份简写:({{ today | date:’MMM’ }})May
- 两位数字月份:({{ today | date:’MM’ }})05
- 一年中的第几个月份:({{ today | date:’M’ }})5
- 日期格式化:
- 数字日期:({{ today | date:’dd’ }})22
- 一个月中的第几天:({{ today | date:’d’ }})22
- 英文星期:({{ today | date:’EEEE’ }})Sunday
- 英文星期简写:({{ today | date:’EEE’ }})Sun
- 小时格式化:
- 24小时制数字小时:({{ today | date:’HH’ }})12
- 一天中的第几个小时:({{ today | date:’H’ }})12
- 12小时制数字小时:({{ today | date:’hh’ }})12
- 上午或下午的第几个小时:({{ today | date:’h’ }})12
- 分钟格式化:
- 数字分钟数:({{ today | date:’mm’ }})11
- 一个小时中的第几分钟:({{ today | date:’m’ }})11
- 秒数格式化:
- 数字秒数:({{ today | date:’ss’ }})11
- 一分钟中内的第几秒:({{ today | date:’s’ }})11
- 毫秒数格式化:
- 毫秒数:({{ today | date:’sss’ }})403
- 字符格式化:
- 上下午标识:({{ today | date:’a’ }})PM
- 四位时区标识:({{ today | date:’Z’ }})+0800
- 自定义日期格式化:
- 年月日:({{ today | date:’yyyy-MM-dd’ }})2016-05-22
- 时分秒:({{ today | date:’HH:mm:ss.sss’ }})12:11:11.403
CentOS修改22默认端口 SSH默认端口
1.添加端口
vim /etc/ssh/sshd_config
将#Port 22的注释去掉并且换行加入Port 443
如果是不是增加,而是修改端口的话,建议先保留22端口,等新端口可以登录再去掉。
443其实是https使用的端口,3128是squid使用的端口。建议使用大端口,比如10000~65535以上。
重启SSH服务 /etc/init.d/sshd restart
2.防火墙开启443端口
vi /etc/sysconfig/iptables
加入-A INPUT -m state –state NEW -m tcp -p tcp –dport 443 -j ACCEPT
重启防火墙 /etc/init.d/iptables restart
3.屏蔽默认端口
确认新端口可以使用后最好能屏蔽掉默认的22号端口
vi /etc/sysconfig/iptables
在
-A RH-Firewall-1-INPUT -m state –state NEW -m tcp -p tcp –dport 22 -j ACCEPT
前加#号注释掉
重启防火墙 /etc/init.d/iptables restart
成功!
Linux CentOS Mysql修改默认端口
一、编辑my.conf
vi /etc/my.conf
二、在[mysqld]下添加
port=3506
三、重启mysql服务
#/etc/init.d/mysqld restart


